Compound Shapes in Illustrator

Daniel Scott
@dan
In this post, we are going to have a look at Compound Shapes in Illustrator. We’ll start with some beginner level compound paths and finish with advanced compound shapes. When you finish reading, you will have a clearer understanding of how compound paths and shapes can help you create exceptional and complex designs – oh, and open holes in things! I’ll lead you across a quick and easy step-by-step guide and make sure you have fun as you tag along.
This post is based on my Illustrator Essentials and Advanced courses, make sure to sign up at Bring Your Own Laptop! When you become a BYOL member, you gain access to this course as well as my 30+ additional courses on Photoshop, Lightroom, InDesign, Figma, and more. As a BYOL member you will also enjoy personalized support, earn certificates, and tackle exciting community challenges. Head here to sign-up!
Ready? Let’s fire up our laptops and start creating amazing vector designs!
Compound Paths vs. Compound Shapes
Compound paths and shapes combine multiple paths and shapes to form a single and more complex element. In that case, what sets them apart?
Compound path
To create a Compound path, we don’t need to consider shape attributes like Fill or Stroke colors. Compound paths are often used to create holes or transparent areas within a shape, but also work great with separate paths.
Let’s say we start with a rectangle path and an ellipse path — select them both (it doesn’t matter if they are overlapping or set apart), and apply the command Make Compound Path, these paths will behave as a single object from that point. One easy way to understand this behavior: If we apply a gradient to this compound path, and both the rectangle and ellipse were separated, the color transition will start in the rectangle and finish in the circle.
Compound shape
Compound shapes also create new single objects from the combination of individual shapes, but are more suited for creating complex shapes, like logos and detailed vector illustrations. To create a compound shape, we use the Pathfinder tool. Pathfinder has different modes (Unite, Minus Front, Intersect, and Exclude) and all these combine the initial shapes in a unique way. It’s an awesome way to explore and expand our creative skills to a whole new level.
Both these techniques are non-destructive. It is possible to release a compound path to edit and readjust paths or double-click a specific path to do these changes in isolation mode. The most significant difference is reflected in the Layers panel:
The Make Compound Path command creates one single layer for the combined object, while Pathfinder creates a group of layers, assigning an individual layer for each element that forms the compound shape. This makes selection and editing much easier.
Still not clear? Let’s take it step by step, then!
Creating a Postcard with a Compound Path
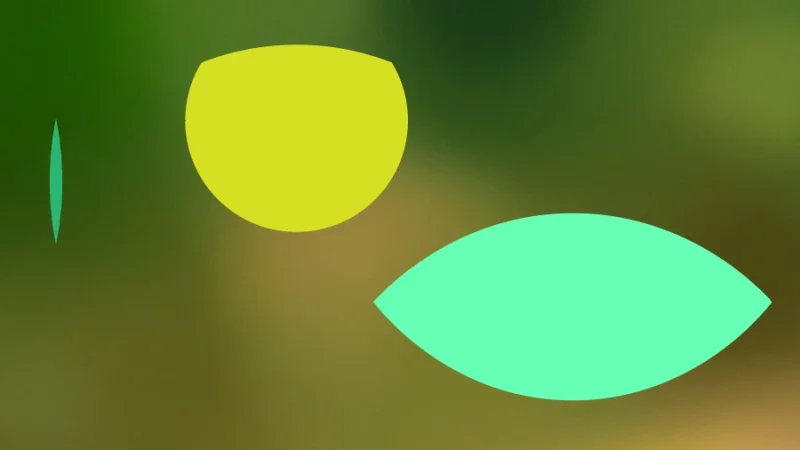
Let’s create a cool movie postcard in Illustrator. To start, we will draw some basic shapes and use Compound Path to make a pair of curious cat eyes. We start by drawing two ovals using the Ellipse tool – one for the eye shape and another for the pupil. Next, we use the Curvature tool to make two corners of each oval sharp by double-clicking the corresponding anchor points. Finally, we draw a circle for the iris and adjust its top to follow the curve of the eye. I’ve applied some Fill colors to my shapes so it gets easier for you to follow the tutorial, but you can work with basic paths, without any color or stroke applied.
Can we create something surprising from such basic shapes? And how can compound paths make any difference?
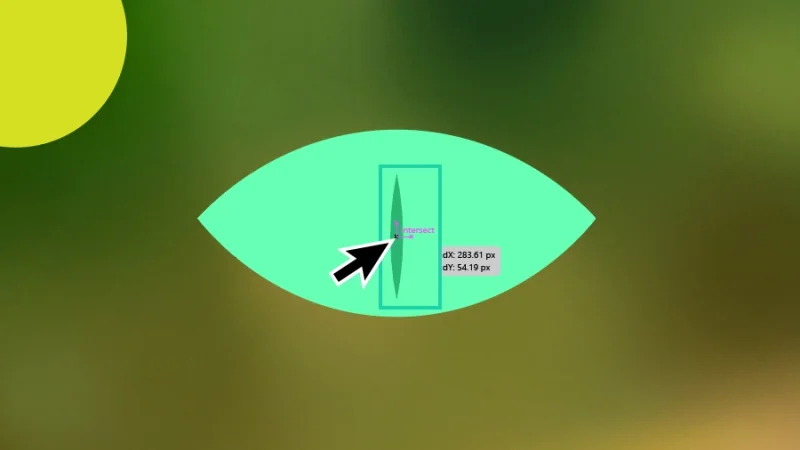
Let’s cut a first hole into our artwork. Place the pupil ellipse over the eye shape and align them. As you drag objects in Illustrator, Smart Guides assists you with the alignment. If you can’t see the smart guides, click View from the top menu bar and then select Smart Guides. Another cool shortcut: Command + U (Mac) or Control + U (PC) will make them visible. There we have it!
Hmmm… this is getting interesting, but it’s still missing that wow factor…
We need to make sure that the pupil is positioned above the eye shape before moving on. This is important because the compound path feature will subtract the pupil’s shape from the layer below, creating a hole. You can check the layer positions in the Layers panel. To change their order, simply click and drag a layer up or down. There’s also a shortcut for this: hold Command on a Mac or Control on a PC, use the left square bracket to move a layer down, or the right square bracket to move it up. Hold Command + Shift (Mac) or Control + Shift (PC) to bring a layer to the top or bottom of the layer order. Quick and Easy!
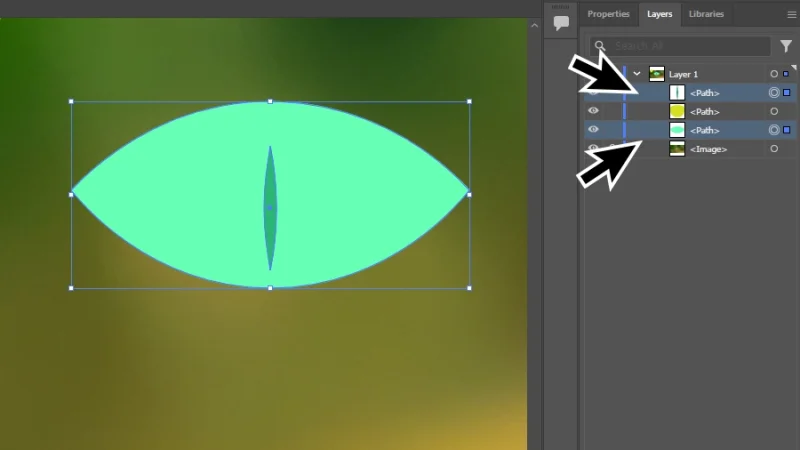
Layer order must be properly set for the compound path to do its job.
With both pupil and eye selected, we click Object from the top menu bar, scroll down the menu that pops up, hover the cursor over Compound Path, and select Make from the flyout menu. As simple as that!
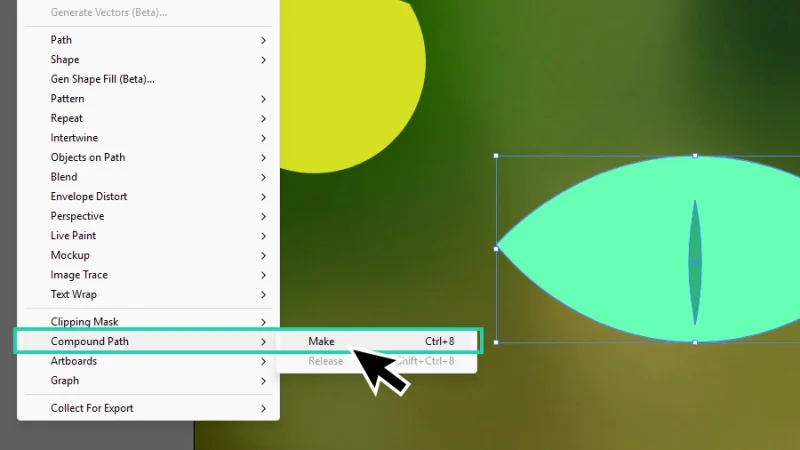
Both layers must be selected before applying Compound Path. The darker shape will cut the one below it.
Another way to do it is selecting both shapes, right-clicking over one of them, and selecting Make Compound Path from the menu that pops up. Which of these methods do you prefer? Is there a third? – you may ask. Could it be shortcut time, again?
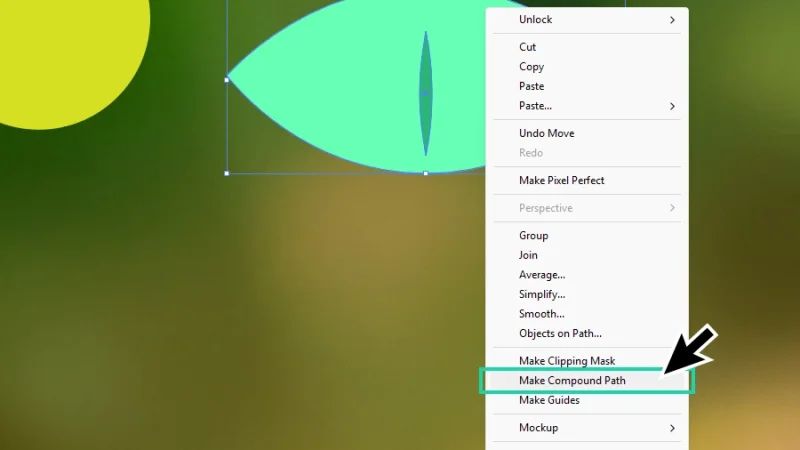
With an object selected in the artboard, right-clicking can be a great shortcut for many features in Illustrator.
You guessed it! Yes, you know I love shortcuts, and I want you to love them too! They are amazing workflow accelerators! Shortcut keys to make a Compound Path: Command + 8 (Mac) or Control + 8 (PC). Cool, huh?
Any of these methods will give you this:
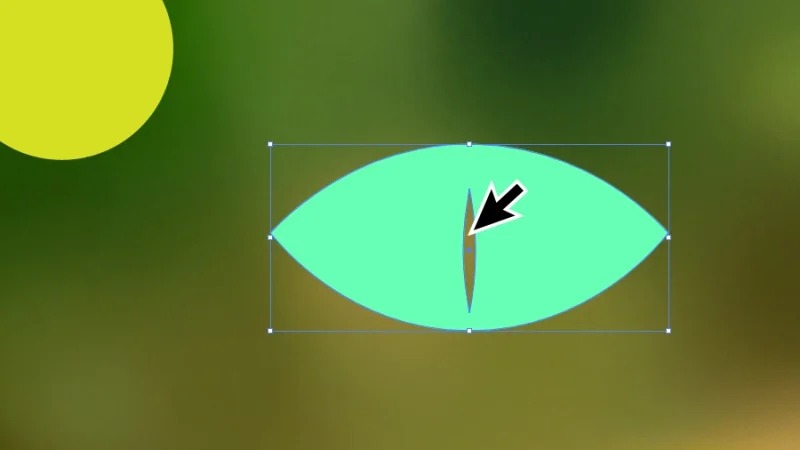
Ah, a perfect cut! But is the iris shape gone? We’ll get there in just a few lines, so keep on reading!
A perfect cut inside the eye shape. As we’ve seen earlier, both paths are now a single object. Next, we will take this exercise to a whole new level of intrigue and fun!
Let’s bring the iris over the eye (and the cut pupil) and select both shapes. As you can see below, the pupil is still visible in the selection.
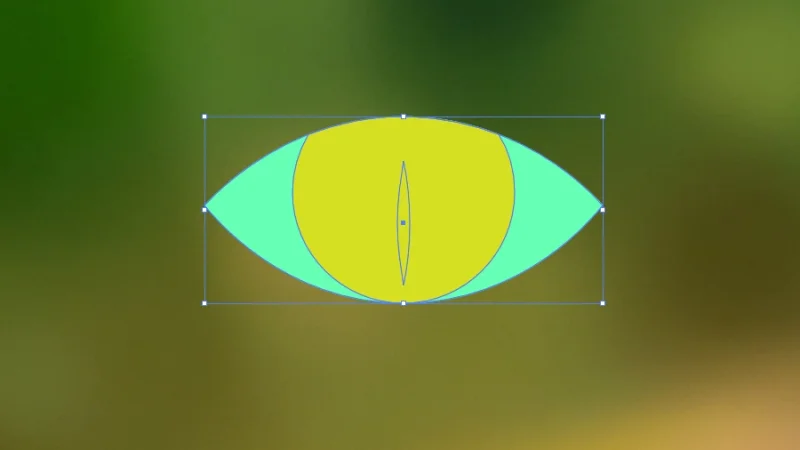
What happens if we cut the eye shape again, using a compound path?
Let’s speed up our workflow and hit that shortcut: Command + 8 (Mac) or Control + 8 on a PC. If you prefer to use any of the other two methods (Object menu or right-clicking), it’s absolutely fine! Even though I prefer shortcuts, I always encourage you to find your own way to work with Illustrator. What do you think will happen with the second cut?
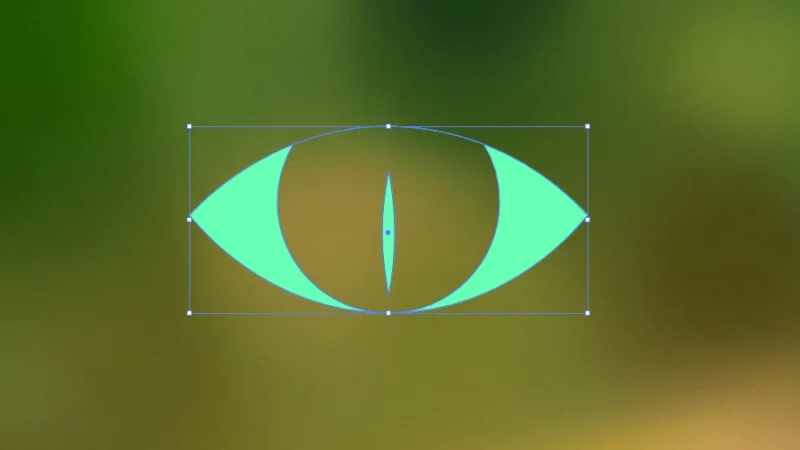
Wow, that is some cool negative space! Nice work, Dan! Well, thank you, Dan!
As an extra touch, I want to give the iris a different color, to add some vibrancy and contrast to our illustration. The easiest way to do it? The Shape Builder tool! With our cat’s eye shape selected, we pick the Shape Builder from the left toolbar by clicking its button, quick and easy!
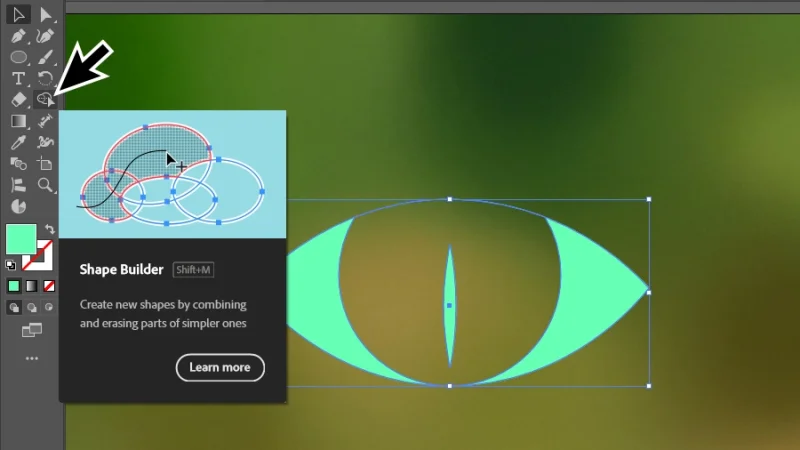
The Shape Builder isn’t all about joining shapes or removing bits of them. We can paint with it!
Next, we move to the Appearance panel, on the right side of the workspace. Click the Fill color square to open the Fill panel and pick a color you like by selecting one of the swatches.
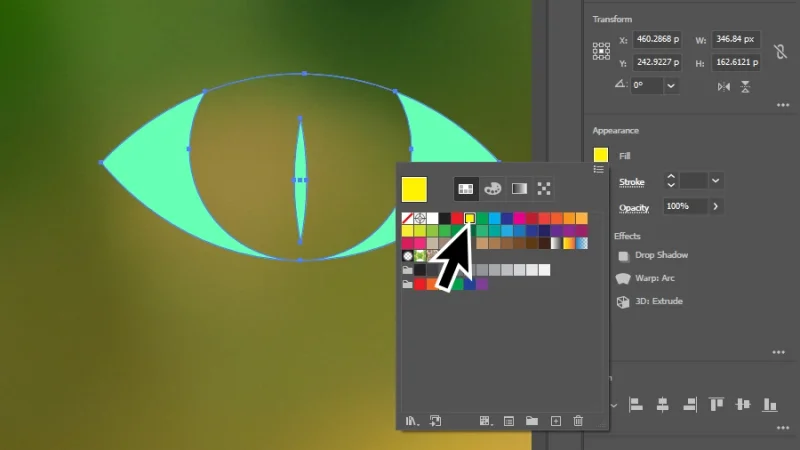
Adding a touch of colour and we are almost there!
Click anywhere outside to close the panel. Move the mouse cursor over the iris, which will darken to confirm you are about to interact with it. Click once, and the new color fill is applied! Speeding up the tutorial, I’ll duplicate the cat’s eye, add a cool art deco frame, type in a classic movie title, move things around a bit and it’s done!

Surprise! What do you think? I’d love to hear your feedback and check out your own artwork!
Timeout #1
Pick up some essential drawing techniques with paths and shapes in Illustrator from this Adobe article on paths and shapes.
Compound Shapes in Illustrator
Let’s go back to basics and understand how Compound Shapes work. We’ll start with a basic square and a circle. I’ve overlapped them, with the circle on top. First, a quick review:

I’ll call this artwork: “Cubist daisy on a spring garden”.
We’ve seen that if we use a Compound Path, we cut a hole into the square below. But is the circle really gone or just creating that hole? If we double-click the shape’s path, we will access it in isolation mode. Next, if we click the circle’s path, it gets selected, and we can move it around, shifting the hole into a new position.

Isolation Mode allows you to select and edit a specific path inside a compound path.
This is great, we have moved the circle inside the compound path and gave it a new placement. In that case, why do we need Compound Shapes? Let’s spot the difference!

Wow, editing a path inside a compound path gives us much more creative freedom! Cool, huh?
To create a Compound Shape, we use the Pathfinder tool. With both shapes selected, we can find it in the Appearance panel, click Window in the top menu bar and select Pathfinder from the drop-down menu, or hit the shortcut keys Shift + Command + F9 (Mac) or Shift + Control + F9 (PC).
Inside the Pathfinder panel, let’s pick the closest option to Compound Path: Minus Front, meaning that the shape on top of the selection will cut a hole in the shape below. Nothing special, here, right? Apparently, yes, but let’s dive deeper. Hold the Option key (Mac) or the Alt key (PC) and then click on Minus Front.
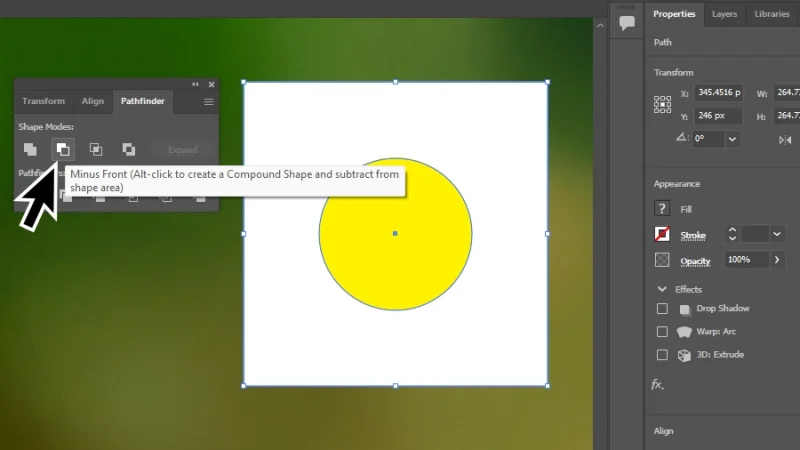
Is Pathfinder’s Minus Front option different from Compound Path?
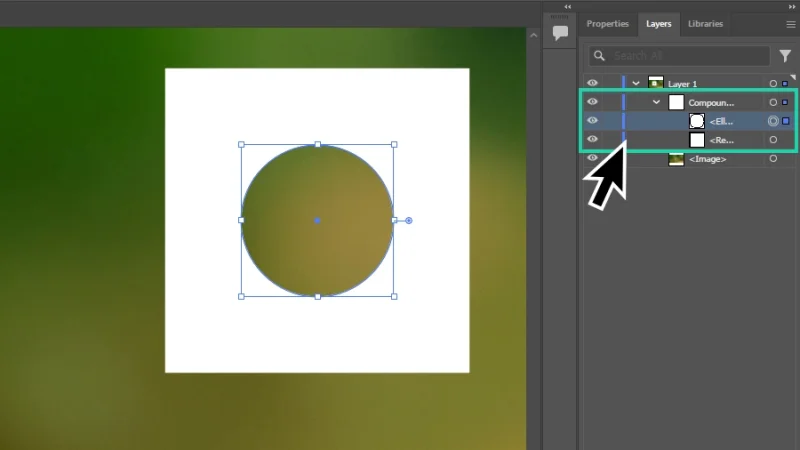
If we check the Layers panel, Pathfinder has created a Compound Shape, a layer group that holds both the circle and the square objects as independent layers.
This can be extremely useful when you are working with complex designs, and you want to edit a specific object inside a compound shape without the use of Isolation Mode.
When we create a Compound Path, Illustrator creates one single layer in the Layers panel, and we need to get into Isolation Mode to make any changes to the shapes inside.
Is going in and out of Isolation Mode that bad? Well, not really, but imagine dozens of shapes and a tight schedule? Won’t it be easier (and faster) for you to use the Layers panel to make the changes you need in your project?
Compound Shapes gives you additional control over the objects joined with Pathfinder.
Selecting each layer, allows us to move, resize, and duplicate objects within the Compound Shape.
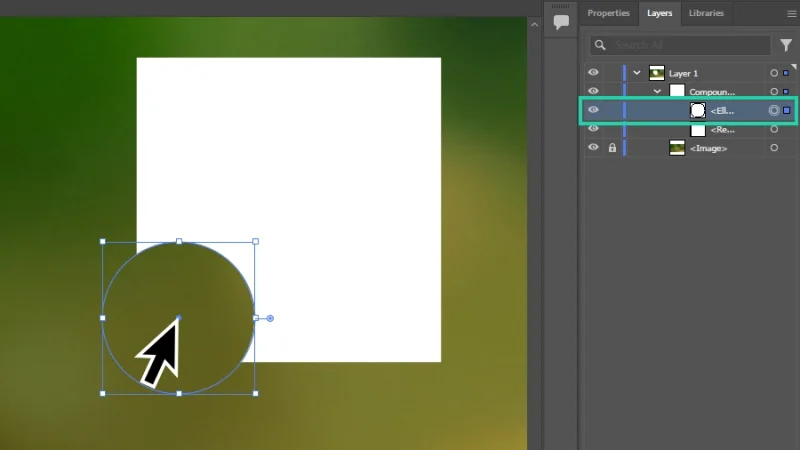
Working with layers is one of the advantages of creating Compound Shapes.
Each duplicated object adds a new layer to the layers group, keeping you in control of their positions and unique settings. With a few more touches and a little imagination, we can create something like what you will see below in a second!
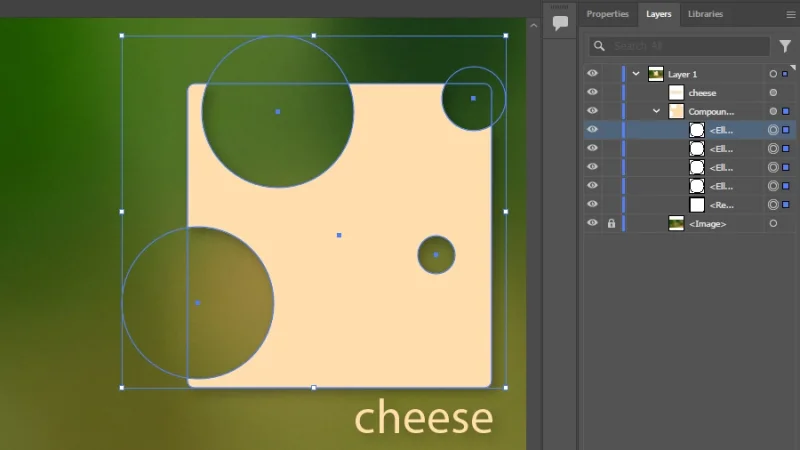
Well, I’m always up for cheese! Have fun!
Timeout #2
Ready to attack more advanced vector designs? Get inspired and challenge your limits at Behance. Check these cool Illustrator artwork galleries and start planning your portfolio headliners!
And There We Have It!
You will use both compound paths and compound shapes as a professional vector designer, so it’s important to understand how each of them best fit different projects. Compound paths are great for quick effects and compound shapes offer more creative flexibility and additional control over complex artworks. Either way, practice these skills and have fun, they are true game changers and workflow lifesavers. Thank you for reading so far, I truly appreciate your support and I’m so happy to know that BYOL blog is helping you on your journey!
What 's Next?
To go deeper with Illustrator, join BYOL and you will gain access to my Illustrator Essentials and Advanced courses as well as my 30+ additional courses on Photoshop, Lightroom, InDesign, Figma, and more. As a BYOL member you will also enjoy personalized support, earn certificates, and tackle exciting community challenges. Get started here.
See you in class! – Dan
Popular posts
Adobe MAX 2025 - File Download
Daniel Scott
Modeling Shortcuts in Blender
Daniel Scott
Plugins in Illustrator
Daniel Scott
How to Straighten the Horizon in Photoshop
Daniel Scott
Go from zero to design hero with our awesome courses!


- Powered by Marvin
- Terms of use
- Privacy policy
- Cookie policy
-
- © Bring your Own Laptop Ltd 2026