
Dotted and Dashed Lines in Illustrator

Daniel Scott
@dan
In this post, we are going back to the basics and diving into an underrated feature that helps designers create unique artwork in Illustrator. Creating dotted and dashed lines in Illustrator can be fun and addictive, especially when combined with other awesome tools and effects like curvature, blend, distort, and so many others. You will have a great time, believe me!
This post is based on my Illustrator Essentials course. When you become a BYOL member, you will gain access to this course as well as my 30+ additional courses on Photoshop, Lightroom, InDesign, Figma, and more. As a BYOL member you will also enjoy personalized support, earn certificates, and tackle exciting community challenges. Head here to sign-up!
Ready to start connecting the dots? Alright, let's go!
How to Create a Dashed Line in Illustrator
Let’s start with this image of a lovely apple. It is part of the downloadable exercise files available for BYOL students. You can use use a different image if you prefer.
Let’s begin with dashed lines.
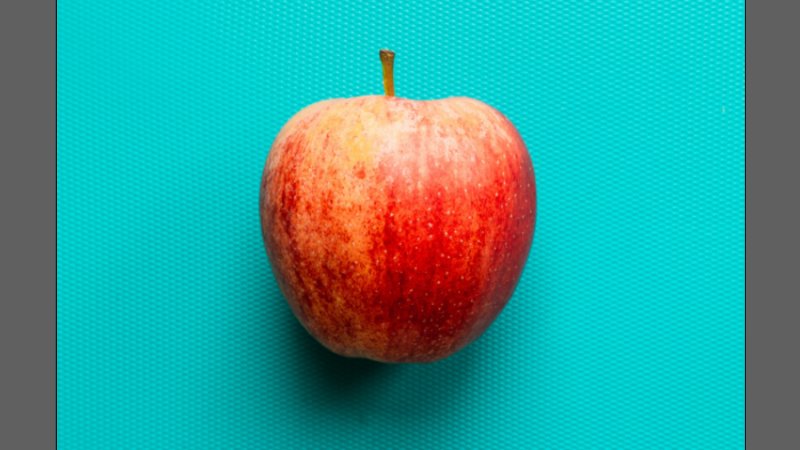
Ah, even the Evil Witch would have a hard time resisting this apple!
We’ll use the Curvature tool to draw a curved path over our apple. This will give our dashed line some additional visual impact and personality – so much better than a boring straight line, right? If you feel more comfortable with the Pen tool, you can go for that one, it’s fine! Click the Curvature tool icon on the left toolbar to start.
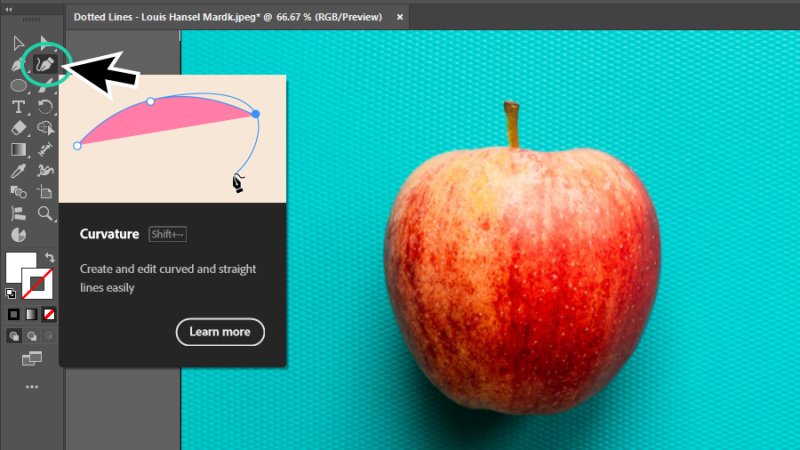
The Curvature tool works like the Pen tool, but it’s awesome for drawing and editing curves.
We’ll set three anchor points over our apple, as we can see in the example below. Click with the left mouse button to set the first anchor point over the left edge, click a second time a bit lower and close to the middle of the apple to set the second, and finish over the apple’s right edge. If we do it right, our path will be smoothly curved, as if it follows the apple’s own curvature. Cool, huh? Hit the Escape key on your keyboards to finish drawing.
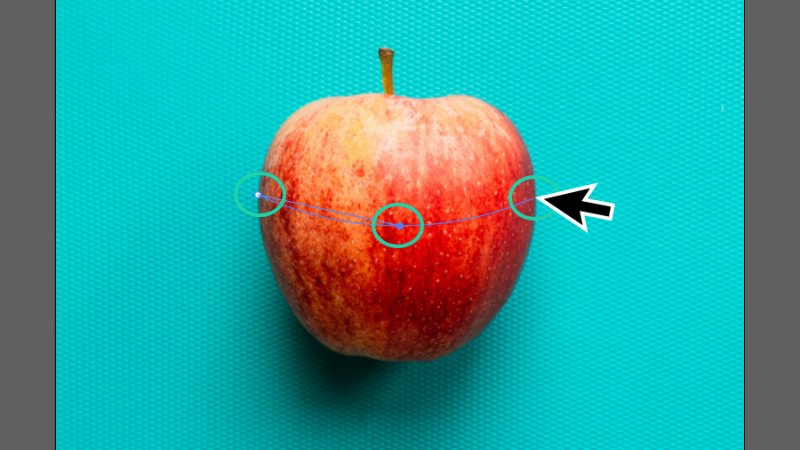
Quick and easy, we have drawn a smooth curve
Now let’s set a stroke on our curved path. We will use the Appearance panel for this step, but I’ll take you to a more specific panel a few lines down. Right now, we just need to make sure that our curved path has no Fill color (you’ll see a white swatch with a red slash across it next to Fill, in the Appearance panel to the right of your workspace) and the Stroke set to White and a weight value of 9 or 10 points. We can set this value manually, using the arrow switches on the left side of the numeric field, or clicking the drop-down arrow and picking it from a list of values. Keep opacity at 100%.
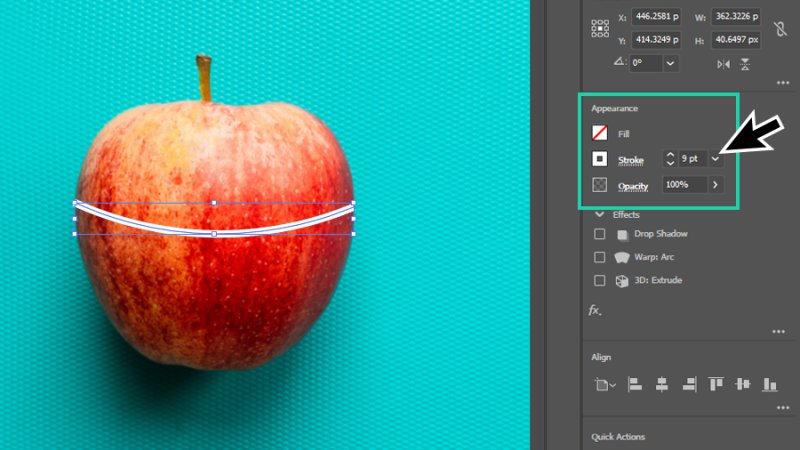
Time to start drawing! Add a white stroke to the path, we will learn how to customize it in the next steps. Fun!
OK, let’s open the Stroke panel! Click on Window in the top menu bar, and then select Stroke. There is a cool shortcut for this, if you love shortcuts as much as I do: Command + F10 on a Mac or Control + F10 on a PC. Let’s take a quick look at the available settings and then explore some of them as we continue to draw our dashes and dots.
Weight: sets the stroke’s weight, or thickness.
Cap: defines an open path’s start and end shape (Butt, Round, Projecting).
Corner: adjusts the appearance of corners (round, extend, retracted).
Limit: Useful when working with multiple strokes and sharp angles, Limit controls how corners form when two lines meet at an angle.
Align Stroke: positions a stroke along a path (centre, inside, outside).
Dashed Line: creates dashed lines, with editable measurements.
Arrowheads: adds basic arrowheads and other cool shapes to the start and/or end of a stroke.
Scale: modifies the start and/or end arrowheads’ size.
Align: places the arrowheads along or outside a stroke.
Profile: sets width to strokes according to preset variables.
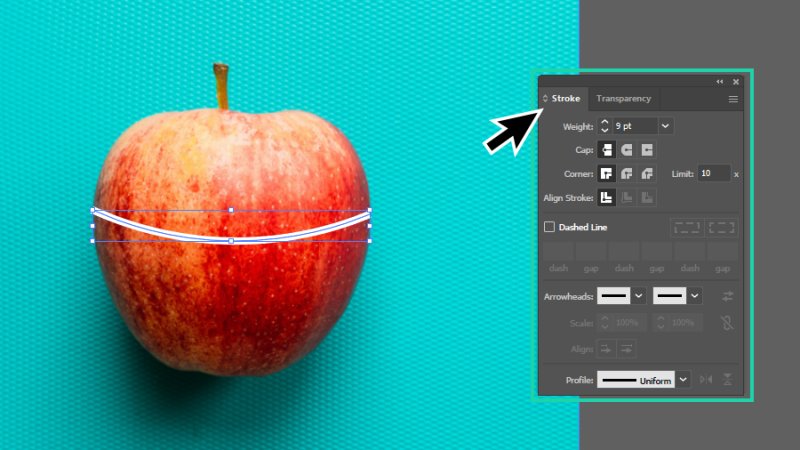
Open the Stroke panel for a clearer view of all the available settings.
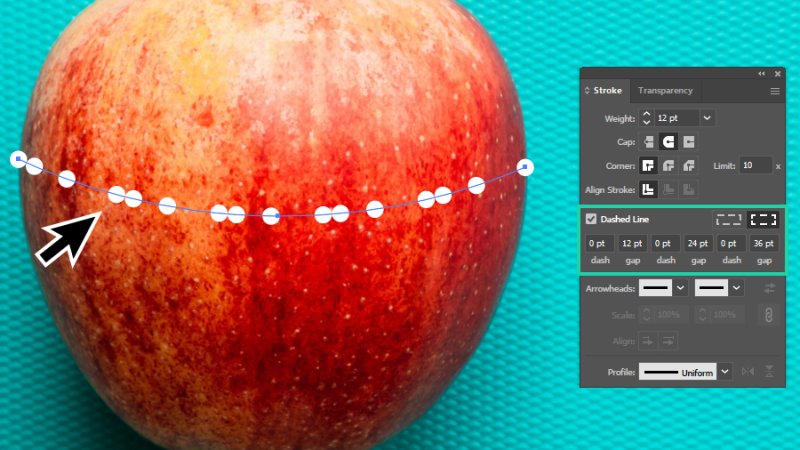
We need to check the Dashed Line checkbox to begin.
Dashed Lines are set in dash and gap (interval between dashes) values. Default dash size is 12 points. If we leave the gap field empty, Illustrator will apply the same value as dash and show a sequence of 12 (dash) – 12 (gap) – 12 (dash) – 12 (gap)…
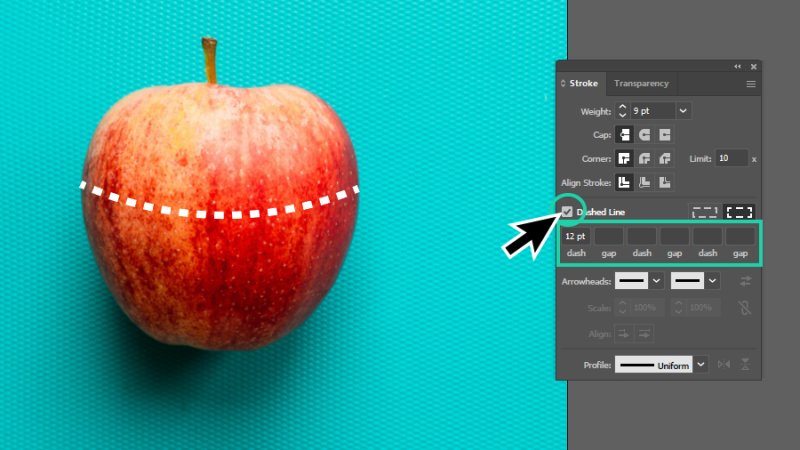
Impressive! A dashed line appeared from checking a single box, without adding any other input.
If we add, for example, a value of 24 points to the first gap field and leave all the rest empty, Illustrator will automatically update the customized stroke to a sequence of 12 – 24 – 12 – 24 – 12 – 24…
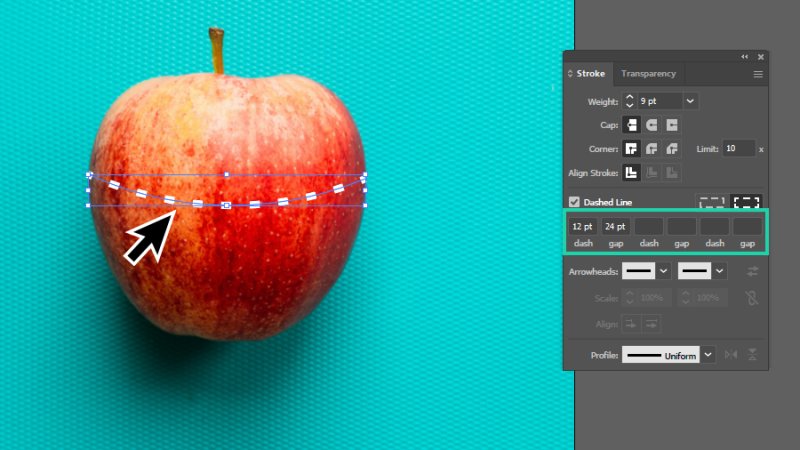
Both dash and gap values can be manipulated to form diverse sequential patterns.
I’ll add a value to all the fields so you can see how we can create some unique patterns from a basic dashed stroke. Cool, huh?
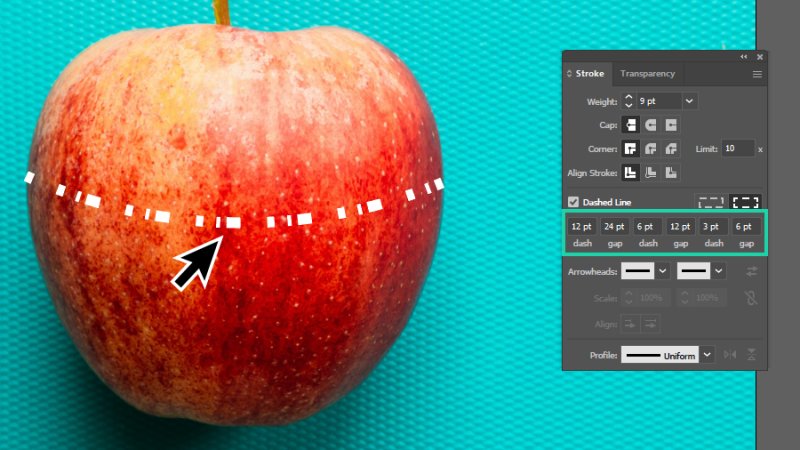
Why does this dashed line remind me of old science-fiction movies?
How to Add Arrowheads to a Dashed Line in Illustrator
Let’s have a quick look at Arrowheads. I’ll show you a basic one, but do dive deep into these, there are some cool styles you can explore and have real fun with.
I’ve set my Dashed Line back to a 12-dash and 24-gap sequence so we can focus our attention on the new elements we are adding.
We can add an Arrowhead to the start point (left drop-down box) or end point (right drop-down box) and reverse the arrow direction by clicking the two arrows icon next to these boxes. Strokes with arrowheads are brilliant for infographics, mood boards, decorating graphics, and so much more!
If the Arrowhead is too large (or small) for the stroke we are drawing, we can scale it down or up using the Scale feature, typing a specific percentage value in the left (start point) or right (end point) fields or click the up and down arrow buttons to adjust them step by step – click the link button to change both arrowheads at the same time.
Finally, you can also use the Align option to set the arrowheads limited to the stroke line’s length (as displayed in the image below) or expanding beyond start and end points.
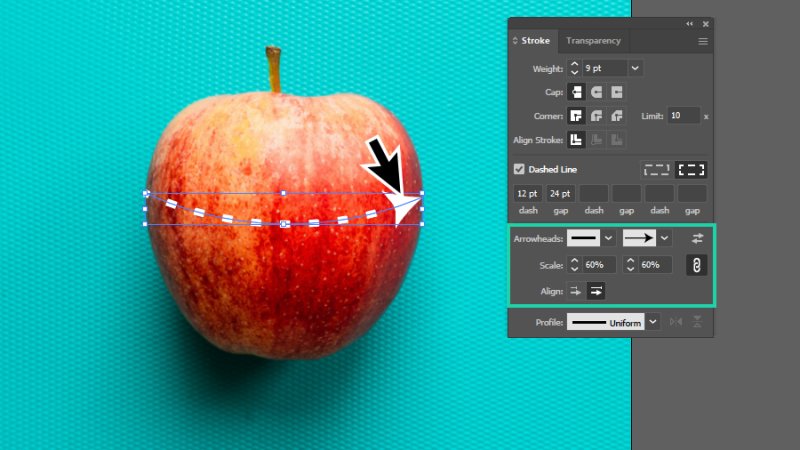
Arrowheads are perfect to suggest movement and direction, visually leading our eyes from a point A to a point B.
How to Set a Stroke Profile in Illustrator
Another visually appealing feature in the Stroke panel: Width Profile. We apply stroke profiles to quickly customize stroke width, or weight, mixing high and low values (and others somewhere in the middle) according to specific profiles.
As an example, with the default profile Uniform applied to a stroke with a weight of 9 points, it keeps width constant from start to end point. If, on the other hand, we apply Width Profile 4 (as seen in the next image), the dashed line starts with a width value of 9 and slowly decreases to 1 at the end point, creating an interesting depth and movement effect, complemented by the arrowhead. We can browse the available profiles by clicking the drop-down button. It is also possible to flip along or across each profile’s orientation by clicking the direction icons next to the profile preview thumbnail. Awesome!
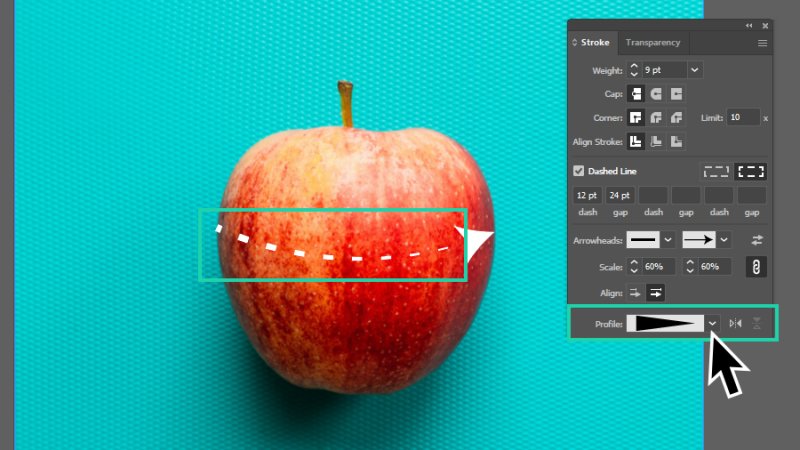
Stroke profiles can make basic strokes look appealing and enhance their purpose in the design.
How to Create Dotted Lines in Illustrator
The process is equal to creating dashed lines, but with a few twists along the way.
I’ll move back a few steps and speed things up. You already know that we start with a curved stroke, give it a weight value, and check the Dashed Line box to split the stroke into dashes. Next, we take some different steps to obtain our dotted line:
We begin by setting the Cap to Round. The dashes’ edges are no longer sharp and take a smooth and rounder shape. We are getting there!
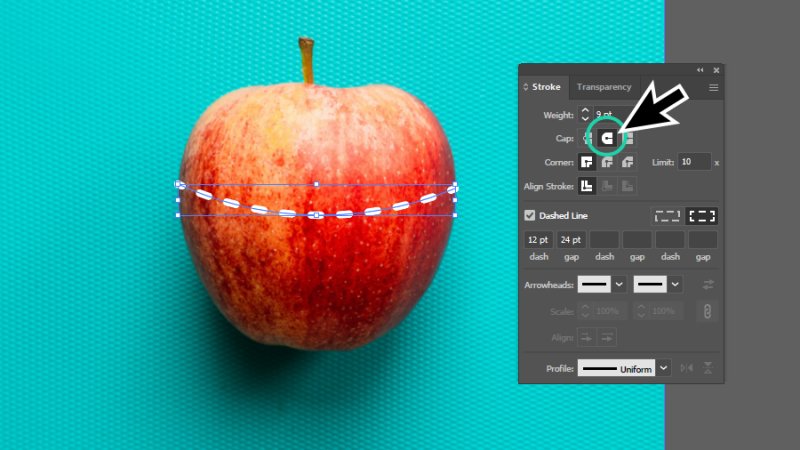
Making the stroke caps Round smooths up the dashed line, making it look more natural. A good start!
Now a bit of an odd second twist: let’s give our rounded dashed line a dash value of zero. Yes, zero. It sounds a bit strange, but this actually means that our dots are built solely on round cap shapes, creating these perfect little circles. Nice!
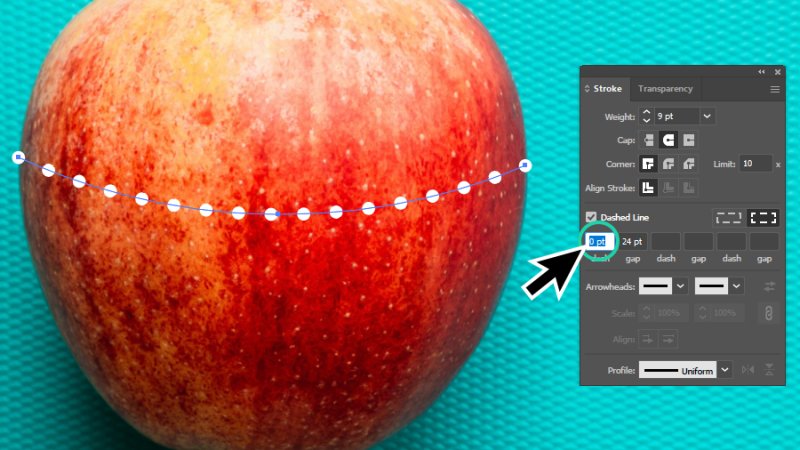
Round caps make the dots in our dotted line, dashes are set to zero and gap value is fully editable.
As we did with the dashed stroke, we can create unique patterns for our dotted lines by assigning different values to the gap fields.
Let’s see… Morse code, maybe?
One more detail: remember Width Profiles? We can apply them to dotted lines, too! Let’s have a look at what Width Profile 1 can do:
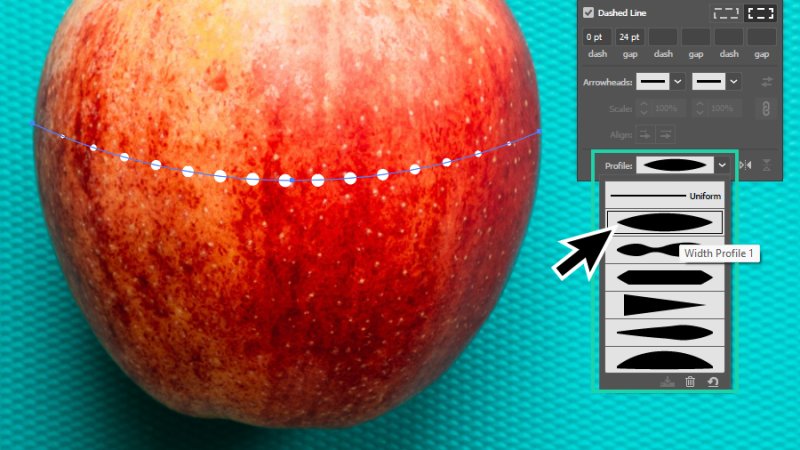
Ah, and here we have it again: science-fiction! This time it looks like a battle star with tiny windows!
Bonus: a finishing touch!
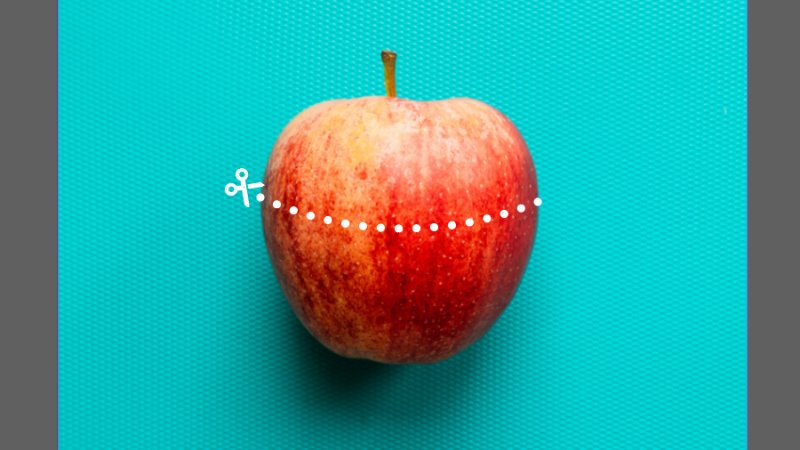
To give our tasty apple and dotted line additional context and fun, I’ve added a vector scissors icon (also available to download for BYOL students) to the composition and, hey, this really looks meaningful now, doesn’t it?
Spoiler alert: explore Arrowheads in the Stroke panel, and maybe you’ll find something very similar. Or maybe something completely different that will make much more sense to you. Who knows? Go have a look!

Follow the dots for a juicy apple!
And There We Have It!
So cool! Dashed and dotted lines can be used to create some incredible designs! You’ll just need to use your imagination, combine all the skills you pick up on your journey to become a Pro vector graphic designer, and surprise everyone with eye-catching pieces like the ones below. This design below is little more than dotted lines combined! How amazing is that?
Combining effects and dotted lines can lead to complex and mesmerizing visuals like this one!
Or, how about dotted lines combined with the Blend tool?

It's a dots party! I can almost hear the music behind this fun visual!
I hope you have enjoyed this blog post, please check the BYOL blog for more tutorials, cool tips, and design tricks!
What 's Next?
To go deeper with Illustrator, join BYOL and gain access to my Illustrator Essentials and Advanced courses as well as my 30+ additional courses on Figma, Photoshop, Lightroom, Premiere Pro, Webflow, and more. As a BYOL member you will also enjoy personalized support, earn certificates, and tackle exciting community challenges. Get started here.
See you in class! – Dan
Popular posts
Adobe MAX 2025 - File Download
Daniel Scott
Modeling Shortcuts in Blender
Daniel Scott
Plugins in Illustrator
Daniel Scott
How to Straighten the Horizon in Photoshop
Daniel Scott
Go from zero to design hero with our awesome courses!


- Powered by Marvin
- Terms of use
- Privacy policy
- Cookie policy
-
- © Bring your Own Laptop Ltd 2026