How to Use the Background Remover in Canva

Daniel Scott
@dan
In this post, we are going to dive into one of the incredible Artificial Intelligence (AI) features that Canva includes in the paid Pro version: Background Remover, a one-click feature that automatically scans complex photos, selects a foreground subject and deletes the background behind it. Background Remover in Canva is an example of how AI is changing the rules and applying new productivity and efficiency standards to graphic design. I’ll take you through a quick and easy step-by-step guide and show you how to transform photos into eye-catching Canva projects.
This post is based on my brand new Canva Design Essentials course! I’m really excited to share it with you and help you get started with this awesome design tool! When you become a BYOL member, you gain access to this course as well as my 30+ additional courses on Illustrator, Photoshop, Lightroom, InDesign, Figma, and more. As a BYOL member you will also enjoy personalized support, earn certificates, and tackle exciting community challenges. Head here to sign-up!
Let’s get the cleaning up started!
How to Use Background Remover in Canva
We’ll create a poster using the Background Remover tool to showcase Canva’s AI technology at work. If you are currently working with the Free version, Background Remover may not be available to you.
If you want to sign up for my Canva Course and get to know all of Canva’s resources and tools, you can try the 30- day trial Pro account and, once you complete all the lessons and earn your certificates, decide if you want to keep the Pro subscription or go back to the Free version, considering your current needs and available budget. You can use this exclusive BYOL link to create your free or 30-day trial Pro Canva account.
We will be working with the elements below. Two photos and a quote line, divided by four separate text elements. We will use the Background Remover to isolate the model with the cool hair from that dark background, place her in front of a new scene and add the text layers with an overlapping effect to add some extra sense of depth and unique look to the composition. These images are available for download as elements in Canva, included in the Pro version. Credits to CoffeeAndMilk (model photo, Getty Images) and veronica111886 (garden background photo, Pixabay). You can use any other image you prefer, of course.
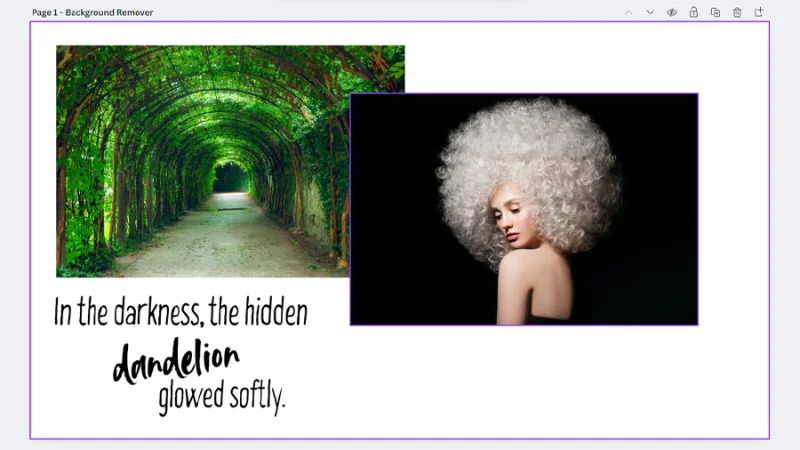
These are Canva elements and text we will combine for our poster composition.
Let’s begin by setting the photo of the garden as our Canva page’s background. I performed a quick search under Elements using the keyword “garden” and picked this one from the Photos section. We can single-click the photo to place it on the page and then click and drag the corner handles to resize it, but there’s a much quicker way to set it up. Right-click the placed photo and select the Set image as background option. Canva will adjust the image to fit the page in a second and we can start working with the second photo. I typed a search for “model” inside Elements and picked this image from the Photos Section. Single-click the thumbnail to place it on the page.
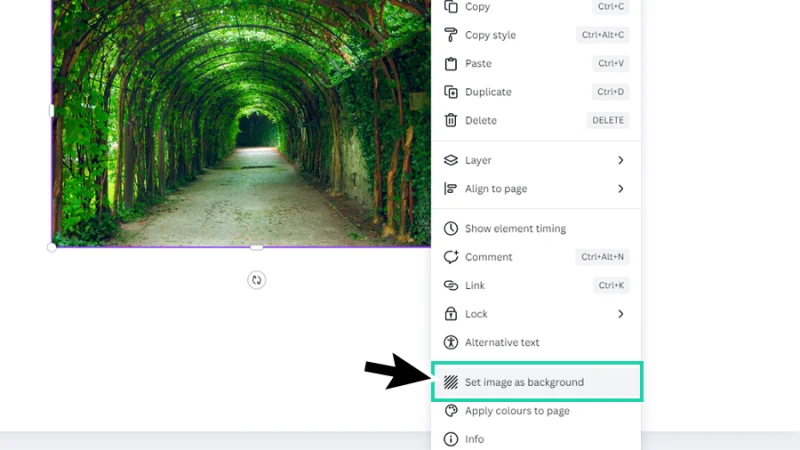
Set image as background automatically adjusts the image to the page’s dimensions and orientation.
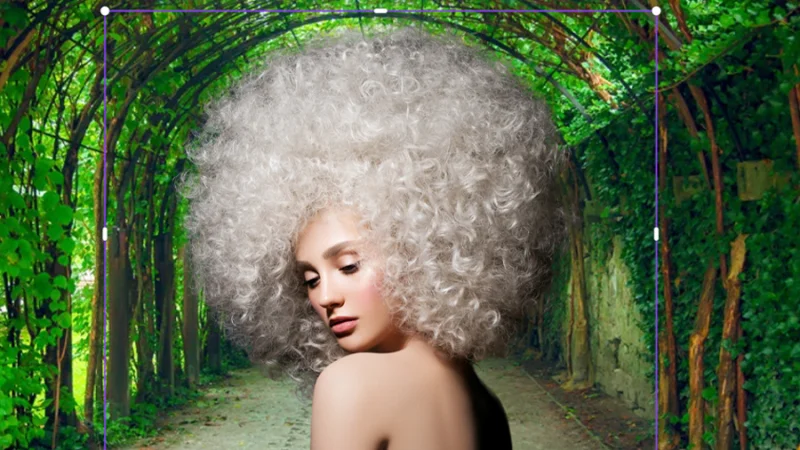
Next, we position the image of the model over the page background. We can adjust its size by dragging the corner handles and/or cropping any areas we don’t need using the handles on the sides of the bounding box. When we are happy with the image dimensions and framing, we can start working some AI magic. Let’s move our mouse cursor to the top toolbar (the one hovering over our Canva pages) and click the BG Remover button. As we can confirm in the image below, the crown icon next to the label lets us know this is a Pro version feature. We will find this icon across Canva, next to other tools, settings, and Elements like icons, graphics, photos, videos, etc., that are only available to paying users.
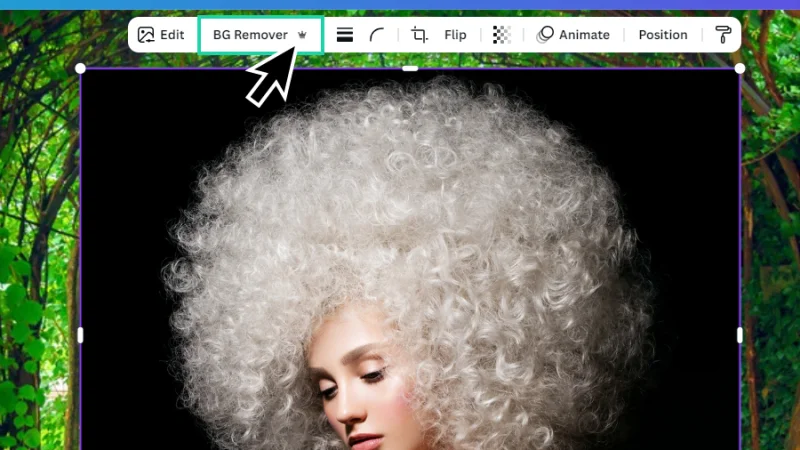
Background Remover is an exclusive benefit for Pro users.
After we click the BG Remover button, Canva will scan and edit the image in a matter of seconds. How fast this happens will depend on your computer resources and internet connection. I must admit, I did deliberately choose the type of photo that used to make graphic designers stop working, go out for coffee, and come back fifteen minutes later. It’s always been a tough job to edit materials like hair, fur, and other fuzzy nightmares and isolate them from a background, keeping them sharp and realistic. With AI, things have become a bit easier!
With a single-click and a few seconds, we have isolated the model from the original dark background.
Look at that! How awesome is this? Some other apps like Photoshop will offer image editors and designers additional settings for fine tuning and improvement, but this looks really good for a single-click-and-boom method!
It’s all about image quality as well as the complexity of you and your clients’ goals. With high-contrast and high-resolution photos, Canva does a great job! If you are not handed such fine materials, you may need to improve selection and masking with more advanced tools. Either way, can you imagine the time we’ve saved by using AI tools like this? Welcome to the revolution!
Let’s zoom in a bit and check out the details in the image below.
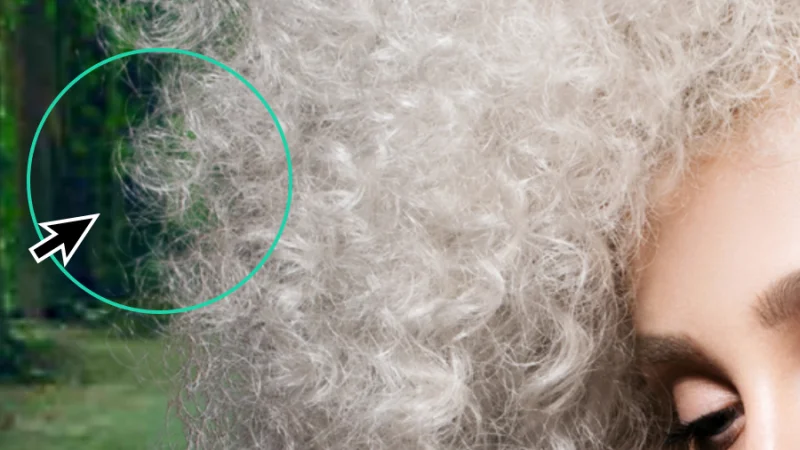
Ah-mazing! I can’t get tired of saying it: one click and we get this fine result. Awesome!
How cool is this? It’s not perfect, of course. There are still some blurry bits, Background Remover has room to evolve, and I’m sure that new features and enhanced mask settings will be added in the near future but, again, we are looking at a result that would work great on mobile screens and digital media, and is good enough for large screens and print media.
With the photo selected, if we click again the BG Remover button on the top toolbar, an additional Background Remover settings panel will pop up.
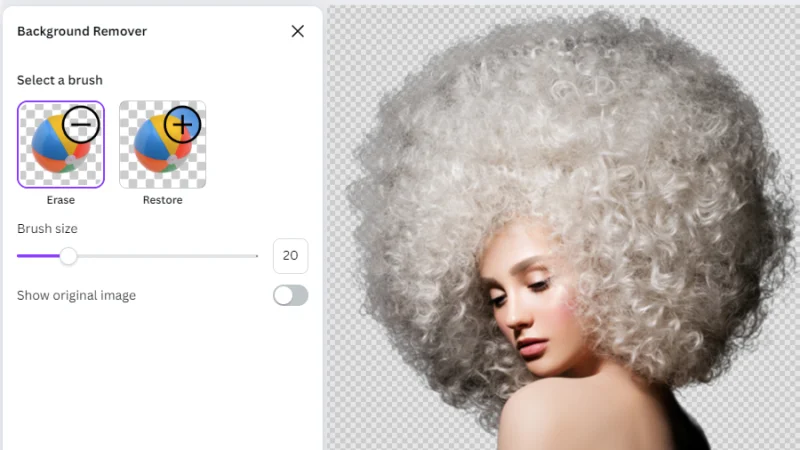
We can adjust the Background Remover selection using the Erase and Restore brushes.
Timeout #1
New to Canva and Graphic Design? Check out this article on myths about Graphic Design and why many people still don’t have a clear understanding of this passionate and creative work!
I know there will be more options in future updates but, in the multiverse timeline on which I’m writing this post, we can only Erase any unwanted bit that Canva failed to remove or restore some details that have been hidden along with the background.
We can also adjust the size of the brush cursor that assists in this process. As I have mentioned above, there is not huge room for fine tuning yet, but Erase and Restore are still great help to finish up this job.
To use the Erase feature, we simply click on Erase, move the cursor to the image preview and click, hold, and drag the rounded brush to remove the details we want to hide. I went a bit extreme for all of you to quickly understand what happens to the photo when we use the Erase brush.
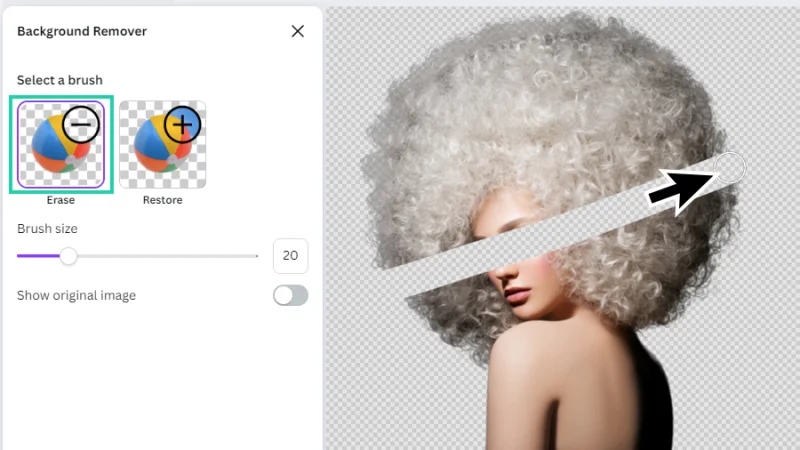
Erase will remove any unwanted content that the automatic process failed to hide.
Let’s try Restore, now. Same method, opposite result: we are going to bring back the details or areas that have been automatically removed.
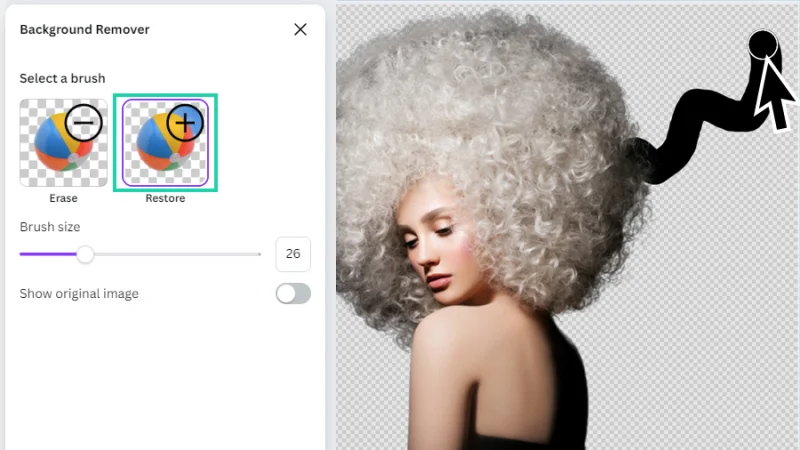
We can come up with some cool effects using the Erase or Restore Background Remover brushes!
One last item from the Background Remover settings panel: Show original image. If we toggle this switch to on (you’ll see the check mark), we will be able to see a preview of the removed areas, presented with a lower opacity level to facilitate the editing work.
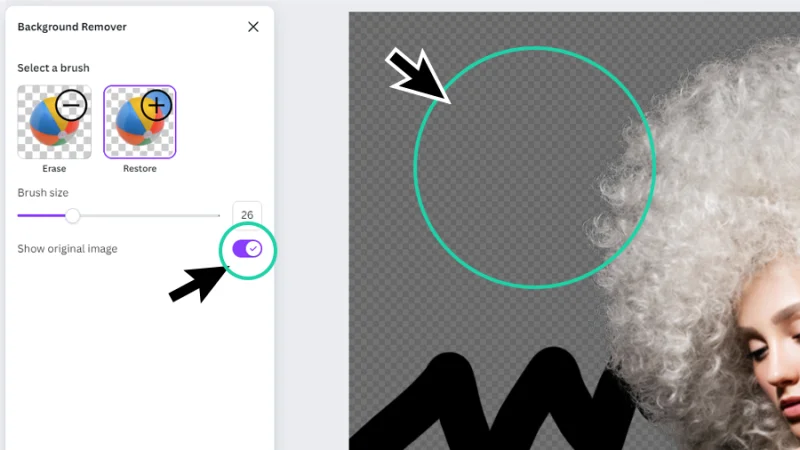
You can’t remember exactly all the details that were removed? Bring the background back and take a peek.
How to create a unique composition using Layers in Canva
We have a new background covering our new poster page. We have removed the dark background from the model’s photo and she is now living inside a new home. Let’s bring the text in and start creating our composition.
We can hit the shortcut key T on both Mac and PC to add a new text box to the page. I typed “In the Darkness” inside the text box. Type in any other quote you prefer or keep following my lead. Next, we select a cool font, set an adequate size, and then click the text color button to pick a font color fill. We can pick one of the preset colors that are displayed in the Color panel or click the Add a new color button (the one with a color gradient and a + icon) to open the Color Picker and manually select the hue, saturation, and brightness we’re looking for. There’s also a field to add Hex codes (white is #FFFFFF) or you can use the Eyedropper to pick a color from the page elements.
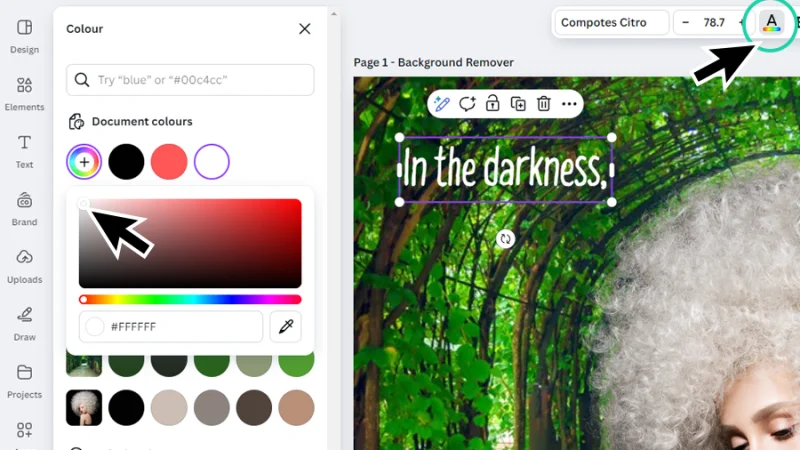
Time to add words to our storytelling!
Nice work!
Let’s add some more text boxes, repeating the method. Use the shortcut key T to place a new text box. You can also copy the first one (Command + C on a Mac or Control + C on a PC), paste it onto the page (Command + V on a Mac or Control + V on a PC), and double-click to edit the text. Follow the image below or add your own story to the composition.

We have placed all our text elements over the background and model image.
Now let’s play with layers and add some depth to our text and image elements. If you are familiar with some tool like Photoshop or Illustrator, you are already familiar with the concept of layers. If you are new to the game, don’t worry, it’s all easy to understand. Just imagine that all the elements inside the Canva page above are placed over each other. The garden photo is at the bottom of the pile, then we have the smaller text objects placed above it, the model photo is placed right over these, and the word “dandelion” is at the top of the pile.
The cool thing about layers is that we can shuffle them! Move each one up and down to change their order and achieve some cool effects! Let’s look up at the top toolbar and click on Position.
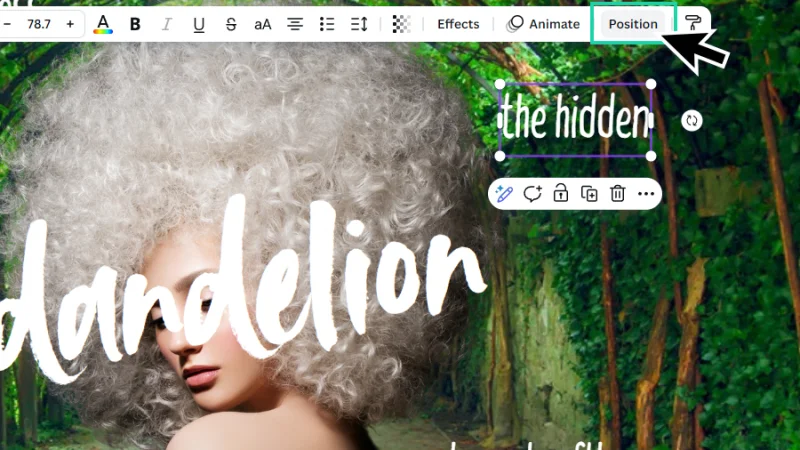
Let’s have a look at how all these elements are layered on the page!
As we can see in the image below, inside the Position panel, under Layers, we can confirm how images and text boxes are ordered on the page. To move a layer to a new position in the hierarchy, we simply click and hold the left mouse button over it and drag it to its new spot. “In the darkness” was out of place, so I moved it down to the position I needed it to be, below the model image. Why? Let’s push on and see!
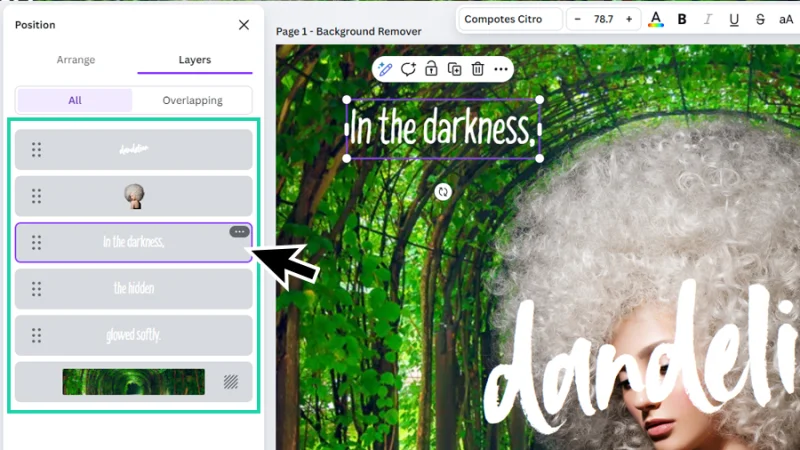
The Layers panel gives us a clear vision of how objects are placed on the page.
Let’s zoom in again. I’ll select “In the darkness” and drag it over to the model image. What happens to it? When they overlap, the text gets hidden behind the model’s hair. This means that this text layer is placed under the model image layer, so it gets partially hidden. Cool, huh?
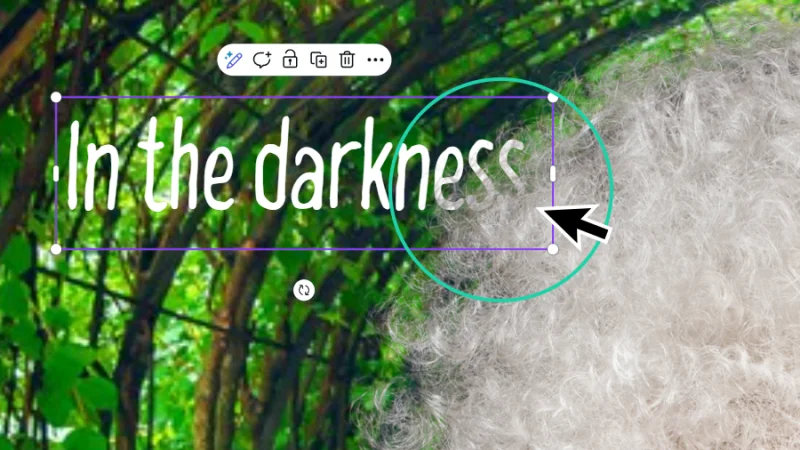
Oh, how cool is that? Now we know why removing that dark background was a good idea!
Let’s do the same with the other smaller text objects and hide bits of them behind the model. “the hidden” will be a bit concealed by her hair and “glowed softly” will be hidden behind her shoulder. “Dandelion” will stay on top of the layers, overlapping the model’s face to create a surprising visual effect. It’s amazing how we can transform a composition simply by manipulating layer order.
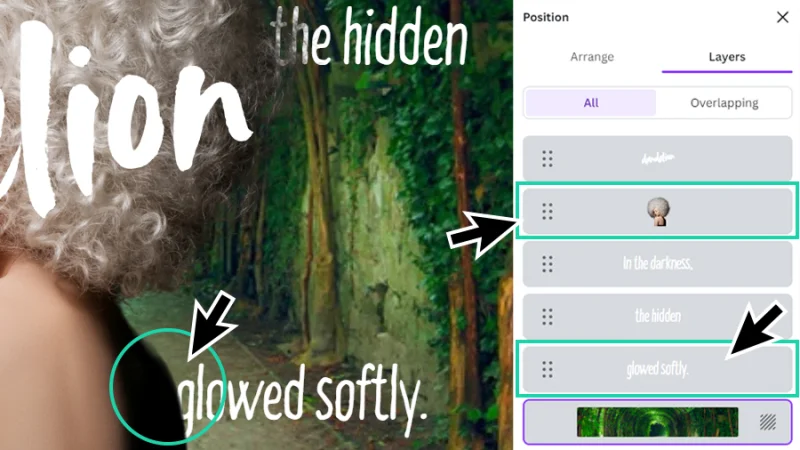
Use the Layers panel to control the different composition elements and aim for a unique style.
Timeout #2
Feeling ready to design for social media, but still need a little push? Get inspired with these impactful examples of X/Twitter headers that really showcase talent and a unique vision.
Let’s wrap it up. Canva is a versatile and fun platform with so much potential that your imagination will find the perfect playground to be happy in. We’ve seen how an AI tool like Background Remover can help us place a subject into a whole new landscape, allowing us to tell a completely different story, stirring up new user emotions and strong reactions to the artwork we are creating. It’s almost like magic, but better! We won’t be going through any more image editing and harmonizing techniques in this post, but I’ll leave you with an example of what we could accomplish with these few visual elements in Canva, in just a few minutes.
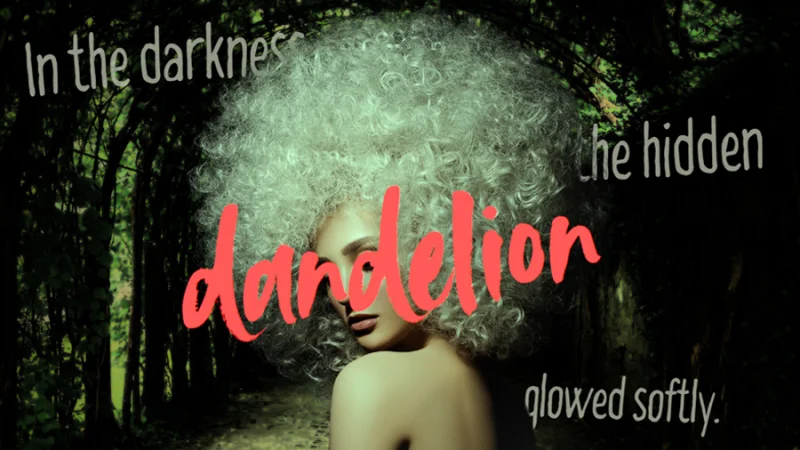
I’ve kept the text visible enough to maintain readability and use color to drag the user's attention to a specific point.
And There We Have It!
Background Remover and Layers are incredible! Wasn’t this surprising and fun? Canva is full of surprises and the more we work with this platform, the better we understand all the solutions it offers for many design needs, skill levels, and creative powers. I had a great time sharing this guide with you and would love to have you join my Canva Design Essentials course.
What 's Next?
Join BYOL and learn how to harness the power of Canva in my Canva Design Essentials course and also my 30+ additional courses on Illustrator, Photoshop, Lightroom, InDesign, Figma, and more. As a BYOL member you will also enjoy personalized support, earn certificates, and tackle exciting community challenges. Get started here.
See you in class! – Dan
Popular posts
Adobe MAX 2025 - File Download
Daniel Scott
Modeling Shortcuts in Blender
Daniel Scott
Plugins in Illustrator
Daniel Scott
How to Straighten the Horizon in Photoshop
Daniel Scott
Go from zero to design hero with our awesome courses!


- Powered by Marvin
- Terms of use
- Privacy policy
- Cookie policy
-
- © Bring your Own Laptop Ltd 2026