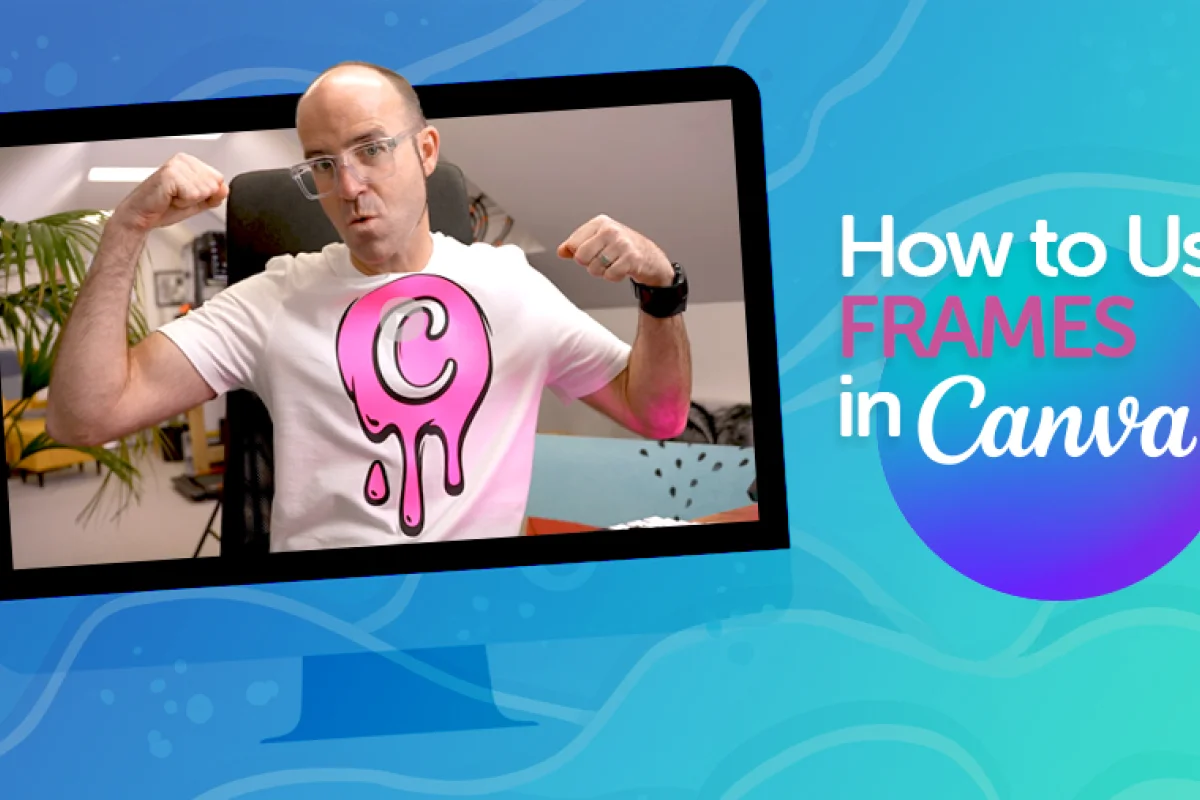
How to Use Frames in Canva

Daniel Scott
@dan
In this post, we are exploring one of the cool elements Canva offers to enhance our work: Frames. As the name indicates, Frames can hold (or frame) an image inside of them, still allowing for that image to be edited, resized and cropped. Frames add unique effects and a professional look to designs in Canva and only take a few clicks to be set up. Follow along for a quick and easy step-by-step guide on how to use frames and really step up your skills as a graphic designer.
This post is based on my brand-new Canva course. I’m excited to share it with you and help you get started with this awesome design tool! Make sure to sign up to Bring Your Own Laptop! When you become a BYOL member, you gain access to this course as well as my 30+ additional courses on Illustrator, Photoshop, Lightroom, InDesign, Figma, and more. As a BYOL member you will also enjoy personalized support, earn certificates, and tackle exciting community challenges. Head here to sign-up!
Ready? Let 's go!
How to Use Frames in Canva
I will use the following sample elements to create a social media post for a coffee shop, announcing Free Coffee Mondays. The photo of a smiling and relaxed dude in the background, a neon-inspired text object, and a picture of an artsy coffee cup. I’m going to frame this last image inside a basic round frame to keep the layout clean and balanced. Let’s see how it’s done!

We need to frame this photo of a coffee cup inside a round shape and create a balanced social media post.
Let’s start by bringing a new frame into the page. Click on Elements in the left toolbar. The Elements flyout menu will open. Scroll down through the different sections until you find Frames. You can click one of the visible frames to place it or on See all to browse more styles.
One cool first tip: if you hover the mouse cursor over the Elements button, the flyout menu will pop up. When you move the cursor away back into the page, the menu will automatically close. If you click the Elements button, the flyout menu will stay fixed and you will have to click on the X next to the top.
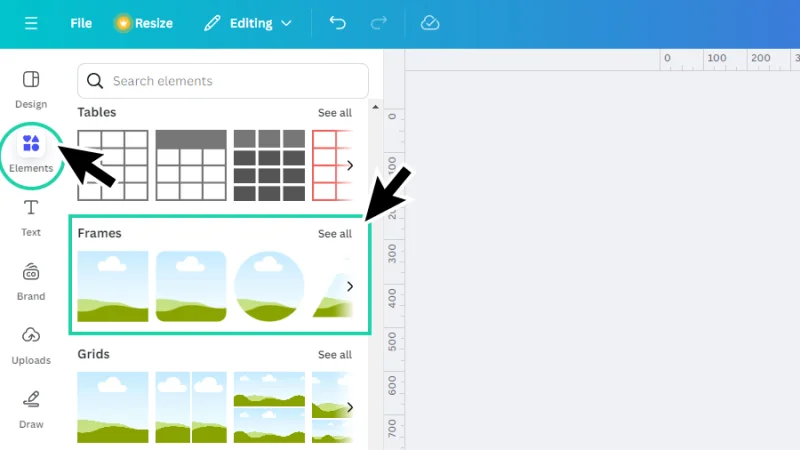
Common frame shapes are immediately available for selection. Click See all to look for more options.
If we click the three dots that appear over the frame’s thumbnail when we hover over it with the mouse cursor, we can find additional information about this element, like authors, license details, and we can also save the frame as a favorite, clicking on the Star icon.
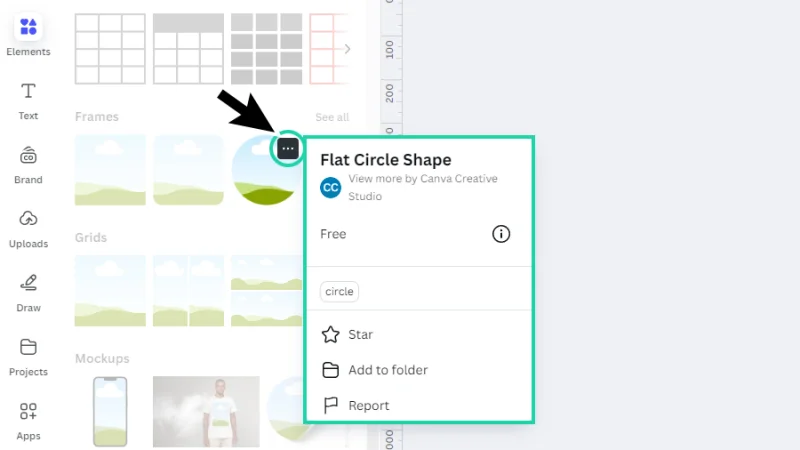
Always verify license details when you are using it in a professional project.
To place the new frame, we can click once on the thumbnail or click and hold the left mouse button and drag it into the page. I’ll use a basic circle frame.
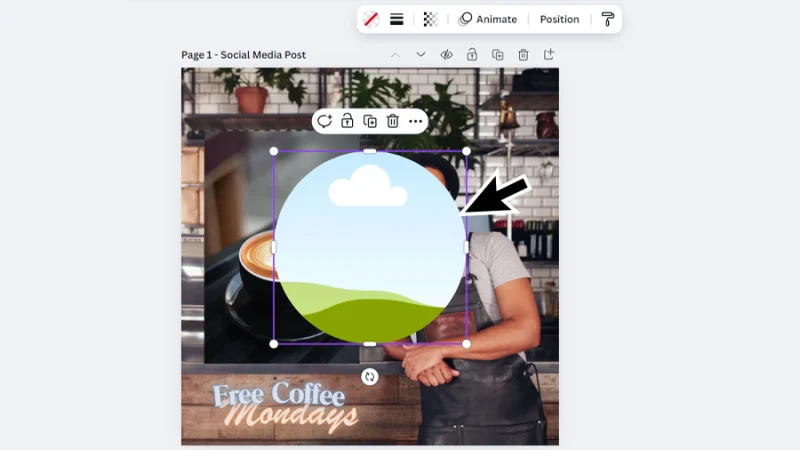
Empty frames display a placeholder graphic, reminding us that there’s still work to be done.
Next, we can drag the new frame to a new position, scale or reshape it using the corner handles. We can also rotate this frame by clicking and holding the left mouse button and dragging the rotate icon beneath it.

Many elements in Canva allow for further editing and customization.
Now let’s bring the coffee cup image into the page. Hover or click the Elements button. You may have to leave the Frames menu, clicking the arrow next to Frames on top. Next, we click the search panel inside Elements, type the word “coffee” and hit Enter on our keyboard to perform the search. Scroll down to the Photos section and click See all to browse the search results.
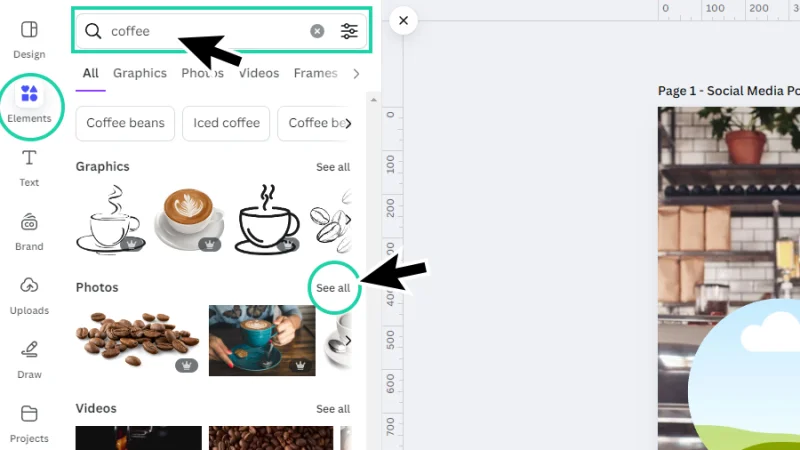
Use the Search feature whenever possible. It saves time and narrows down element selection.
Browse images until you find the one you are looking for. Once again, clicking the three dots opens an additional information panel, from which you can check license terms, refine search using similar keywords, or add the element to Starred (favorites) clicking the Star icon.
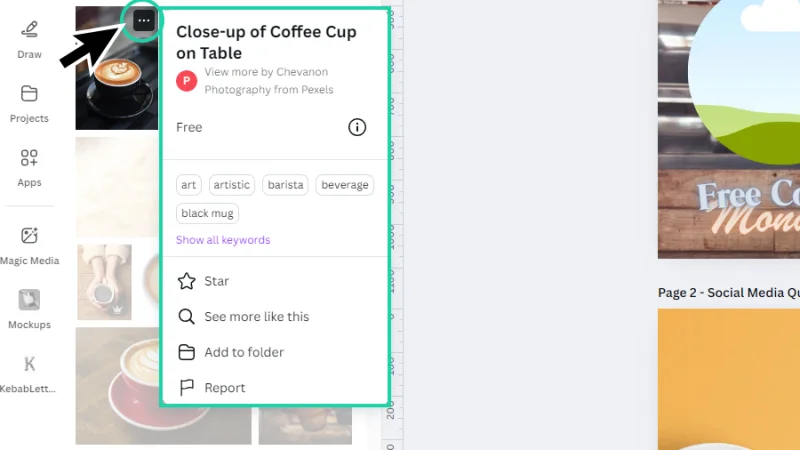
This window gives us the chance to fine tune our search using related keywords.
Let’s bring our coffee cup into the layout and place it inside the frame. Here’s the quick and easy way: we click and hold the left mouse button over the image thumbnail and drag it until we see it previewed inside the frame. Releasing the mouse button places the photo inside the frame. If we single click the thumbnail, the image will be placed inside the page, and we will have to drag it into the frame from there.
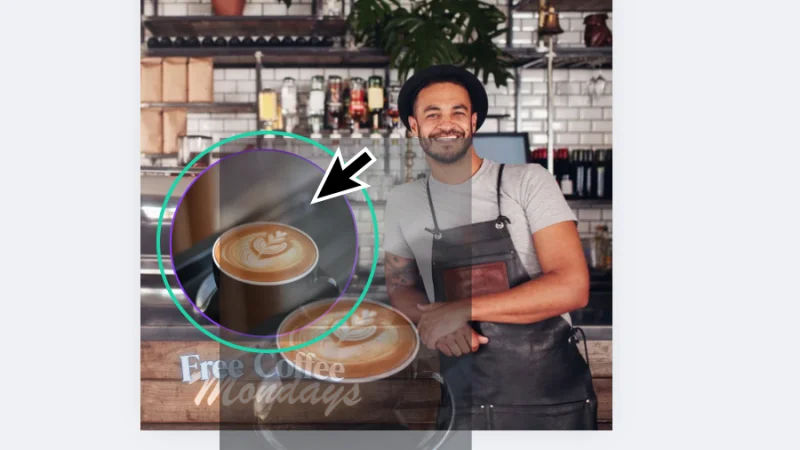
When you see the image previewed inside the frame, release the mouse button to place it.
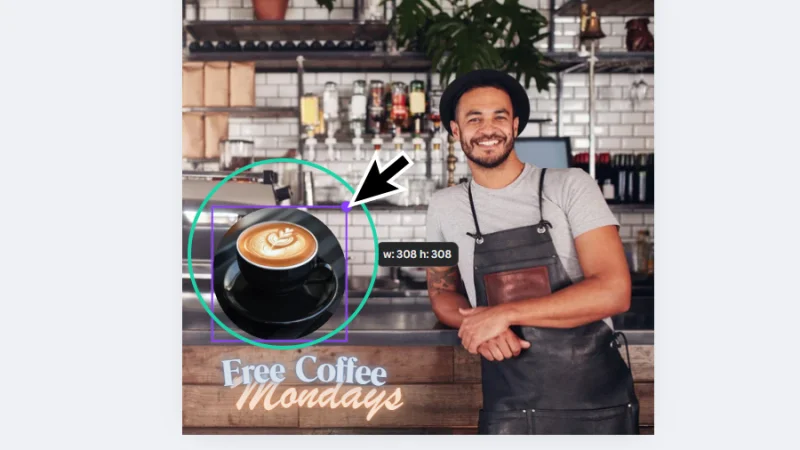
We can edit the image placed inside the frame. To do this, we double-click the frame and make the necessary adjustments. Use the corner handles or the Crop panel that pops up next to the left toolbar to resize and rotate the image inside. A grid assists you during editing. Click anywhere outside the frame to close the editing window.

You can always come back to the image placed inside the frame and edit it.
With the frame selected, the handles will now allow us to edit the frame itself. The image inside this frame will automatically adjust to its new shape and size. Changing the frame’s position inside the page doesn’t change the framed image.
We can easily customize elements and frames in Canva. This gives us huge creative freedom.
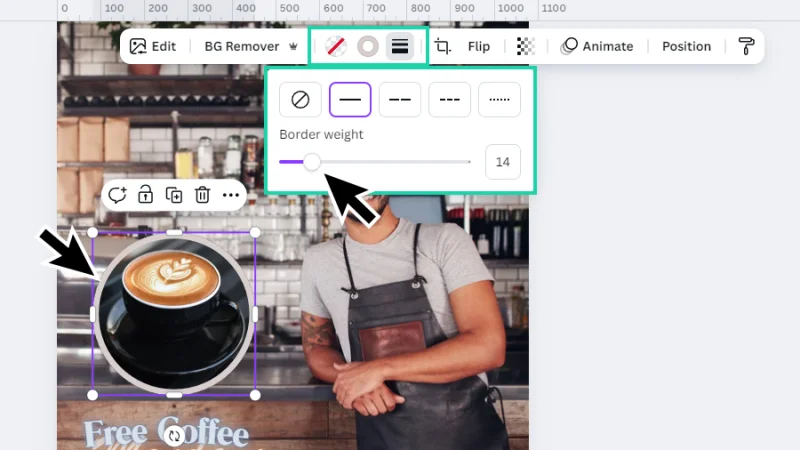
Another cool thing we can do with frames: add a border around it to add extra impact or make it stand out from the background. Let’s move the mouse cursor up to the dynamic toolbar placed at the top of the Canvas background and click the Border style button (the one with the three horizontal lines) to set the border style and weight. Once we set a weight, the Border color icon pops up, allowing us to assign the new border a specific color.
Borders create a clear visual separation from the background when we combine complex images.
Timeout #1
Need a little help to get started? Explore Canva’s Learn Design Inspiration articles to get inspired as you learn, practice, and work as a professional graphic designer with Canva.
Let’s have a quick look at a second example, using some different steps to complete our design. We now need to create a new social media post to share a special quote about coffee to inspire the shop’s customers. Let’s begin with a blank page. There’s a cool shortcut to create a new blank page: Command + Return on a Mac or Control + Enter on a PC. Nice! You know I love shortcuts!
Remember you can use templates or start from a clean page to really challenge your creativity.
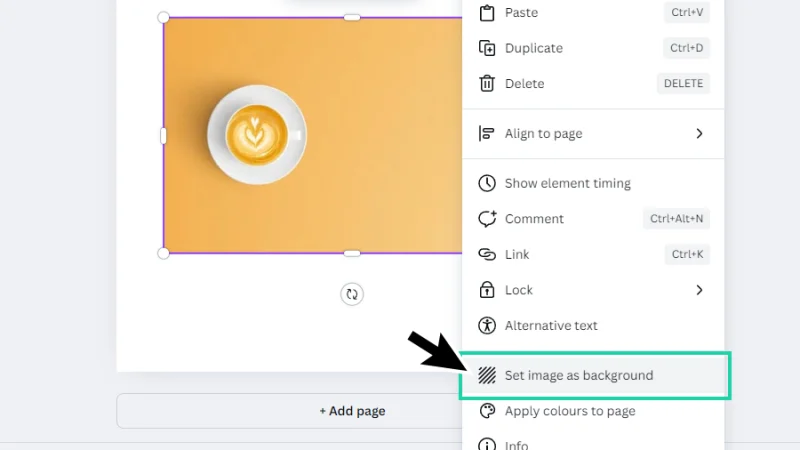
We select a new image browsing Photos, inside Elements. Let’s click the thumbnail to place it inside the page. And another cool tip for you: right-click the image and select Set image as background. Canva automatically adjusts the image to fit page size. Awesome!
Another time-saving trick is accessible for Canva users.
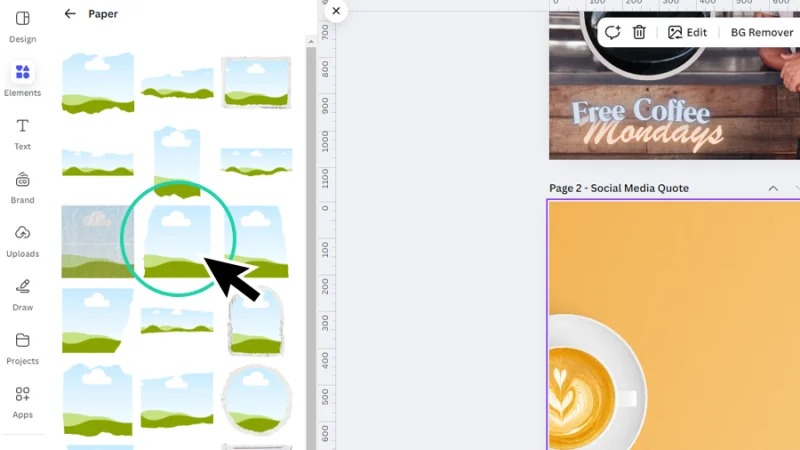
Next, we go back to Elements to pick our new frame. Scroll down to the Frames section and click See all. Pick a frame category (Basic shapes, Devices, Paper, etc.) and click See all over the thumbnails to browse its content.

There are layers of content inside the Elements panel. Explore it to find all the available resources.
We browse the style thumbnails inside Paper until we find the adequate frame for our social media design. Click once to place it inside the page.
There is a range of basic and styled frames to choose from. Pick the one that better fits your vision.
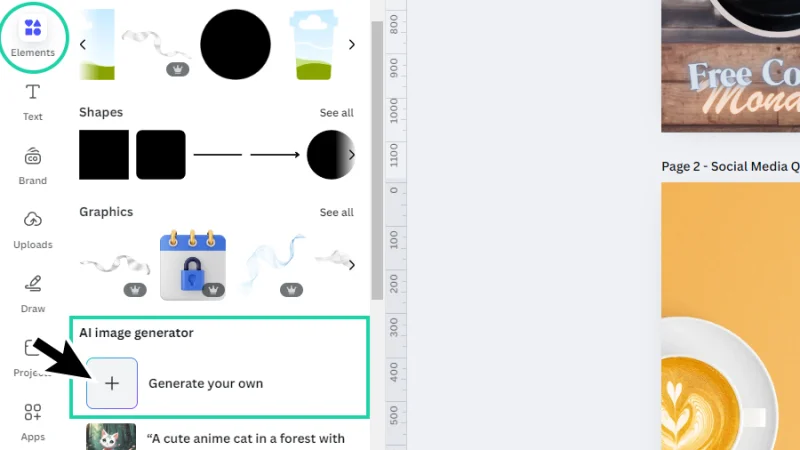
Now let’s find a photo to create a background for our quote, inside the new frame. This time let’s use Canva’s generative AI feature placed inside Elements. Click on the Elements button and scroll down to the AI image generator section. Next, click the Generate your own button to open the prompt window.
Time to start the AI game in Canva!
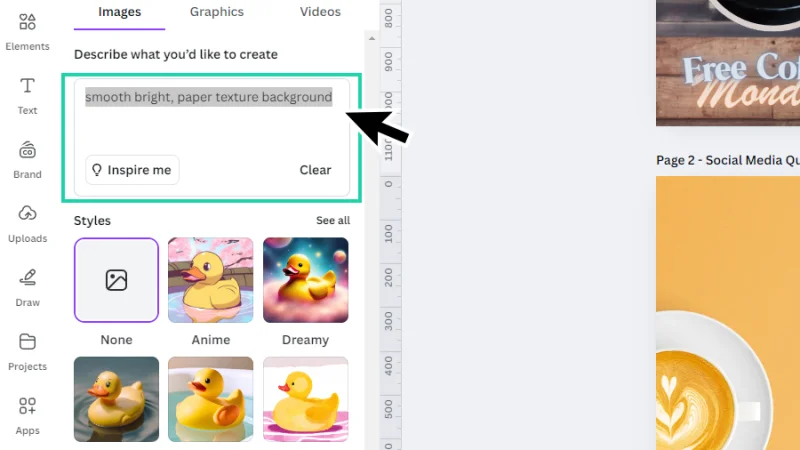
Inside the prompt field, we type a basic text description of the background we are looking for. Canva will render it into a brand-new image in seconds! We’re keeping it simple for this post’s purpose, but you can go wild with your prompts and check how far Canva can keep up with your imagination. Remember there is a limited number of images you can generate, according to the plan you have subscribed to.
It's incredible how AI can create complex imagery from simple text entries.
Canva delivers four options for the prompt we have set up. We can update the text description and refine the next result, ask Canva to generate a new batch of images from the same prompt, or click and drag the image we prefer into the frame.
To wrap this design, we add a new text box to our social media post page. There is a quick shortcut for this: the ‘T’ key on both Mac and PC. Type the quote inside the text box or set a placeholder for now. We can edit the text from the dynamic toolbar above the page.
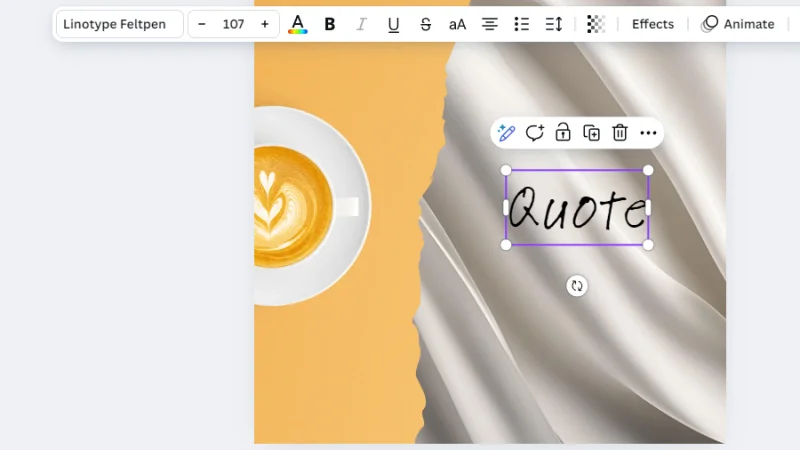
The dynamic toolbar adapts to the tool or design feature active in Canva.
Check the image below to check out how I finished these designs! I’d love to see how you tackled these challenges! Had fun? I surely did!
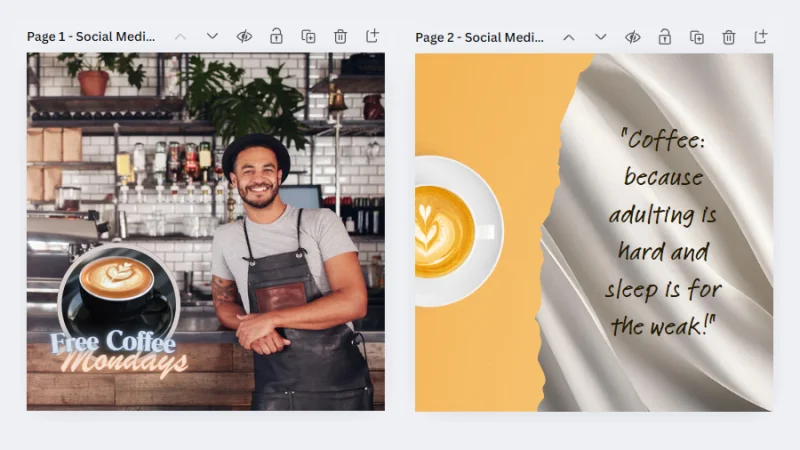
Isn’t it amazing how quickly we have assembled these cool social media posts with Canva?
And There We Have It!
Isn’t Canva great? Working with images and frames is fun! Creating an image that successfully shares a message generates a powerful emotional response from our users. Keep that in mind and always value the details! Now that you know what frames are, how they work, and the creative boost they bring to your designs, go explore more options and amaze everyone with your graphic design portfolio!
If you want to sign up for my Canva Design Essentials course and get to know all of Canva’s resources and tools, you can try the 30- day trial Pro account and, once you complete all the lessons and earn your certificates, decide if you want to keep the Pro subscription or go back to the Free version, considering your current needs and available budget. You can use this exclusive BYOL link to create your free or 30-day trial Pro Canva account.
What 's Next?
When you sign-up for BYOL, you will gain access to my new Canva Design essentials course as well as access to my 30+ additional courses on Illustrator, Photoshop, Lightroom, InDesign, Figma, and more. As a BYOL member you will also enjoy personalized support, earn certificates, and tackle exciting community challenges. Get started here.
See you in class! – Dan
Popular posts
Adobe MAX 2025 - File Download
Daniel Scott
Modeling Shortcuts in Blender
Daniel Scott
Plugins in Illustrator
Daniel Scott
How to Straighten the Horizon in Photoshop
Daniel Scott
Go from zero to design hero with our awesome courses!


- Powered by Marvin
- Terms of use
- Privacy policy
- Cookie policy
-
- © Bring your Own Laptop Ltd 2026